 English
 Intro Part 9
This is Part 9 of the tutorial series on building a Lamborghini Urus with WebGL/PlayCanvas.
For those who haven't read the previous parts, here's a demo video.
In this part of the tutorial, we will add even more interactivity to the scene, create custom scripts and program the interface.
Access to materials, such as: models in the format "FBX", textures, baked maps "AO" and more, you can get by subscribing to Patreon.
Patreon - 3DGROUNDWheel rotation script
Download the script below by calling the context menu on the "view raw" link and clicking "Save link as...". Add the script to the project by dragging the "wheelRotation.js" file into the "Assets" panel → "scripts".
Select the front tires object in the "Viewport", then click the "Inspector" button "Add Component", add the "Script" component. From the "Add Script" list of scripts, select "wheelRotation".

Do the same for the rear tires object and all disks. It is important to apply the script specifically to objects, and not to templates or "Entity", which is higher in the hierarchy.
What is convenient, you do not need to make any additional settings, just apply the script and you're done.
Press "Play", the wheels began to spin! Due to the fact that our texture is shifting and the wheels are spinning, it creates the effect that the car is really driving through the desert, although it is static.
Result

Door opening script
Download the "openDoors.js" script and add it to your project in "Assets" → "scripts".
Select the left doors in the "Viewport" and apply the "openDoors" script to the object, after adding the "Script" component.
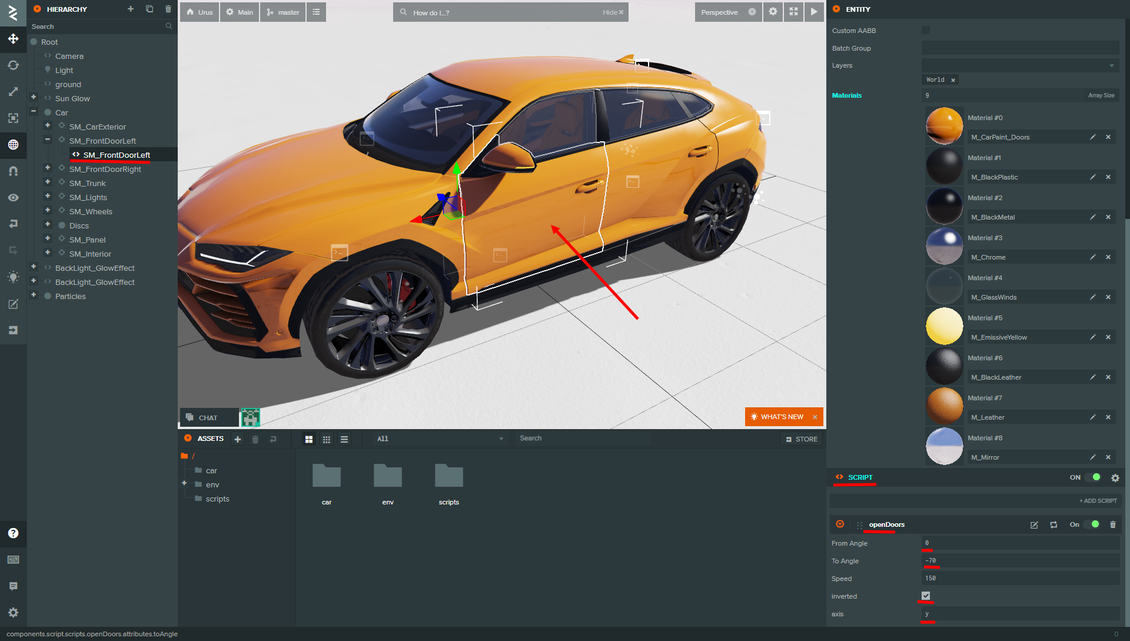
Be sure to set "axis" equal to "y" in the script settings for the left door and enable the "Inverted" checkbox.
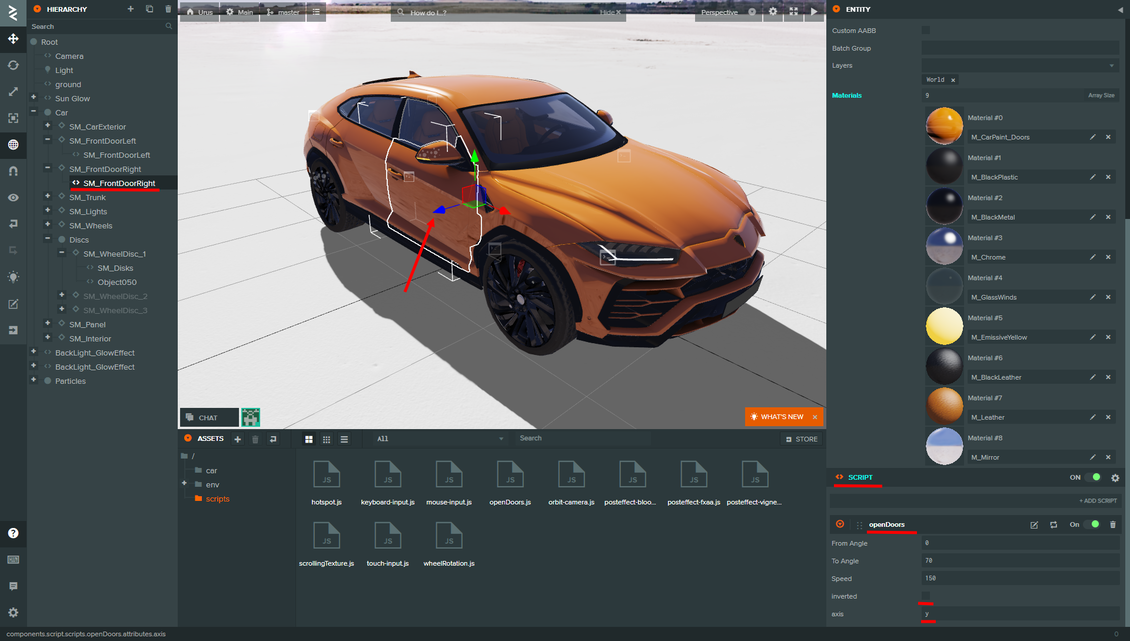
By analogy, we act with the right door. Select the object in "Viewport", apply the "Script" component, select "openDoors" from the list, specify the settings as in the screenshot below.
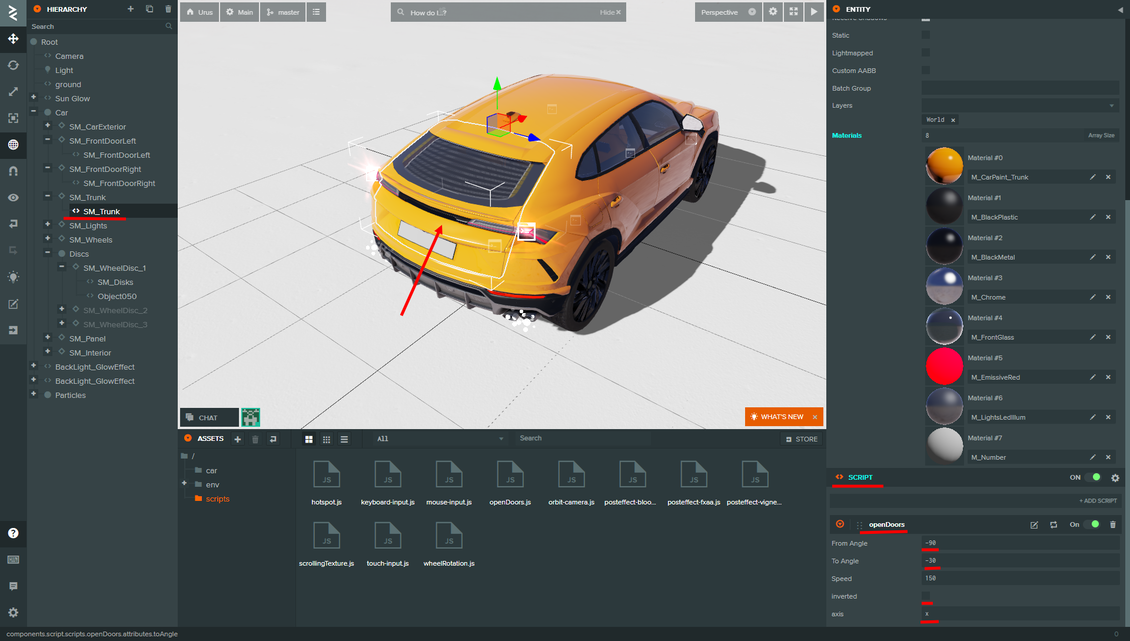
And all the same for the tailgate.
Press "Play" when the player loads, press the 1 button on the keyboard, the doors will open for you. Later, we will open the doors with a button in the interface.
As you can see, working with crypts is very simple, and thanks to the universal settings, they can be used in other projects.
Result

Disk changer script
Download the "setColor.js" script and add it to your project under "Assets" → "scripts".

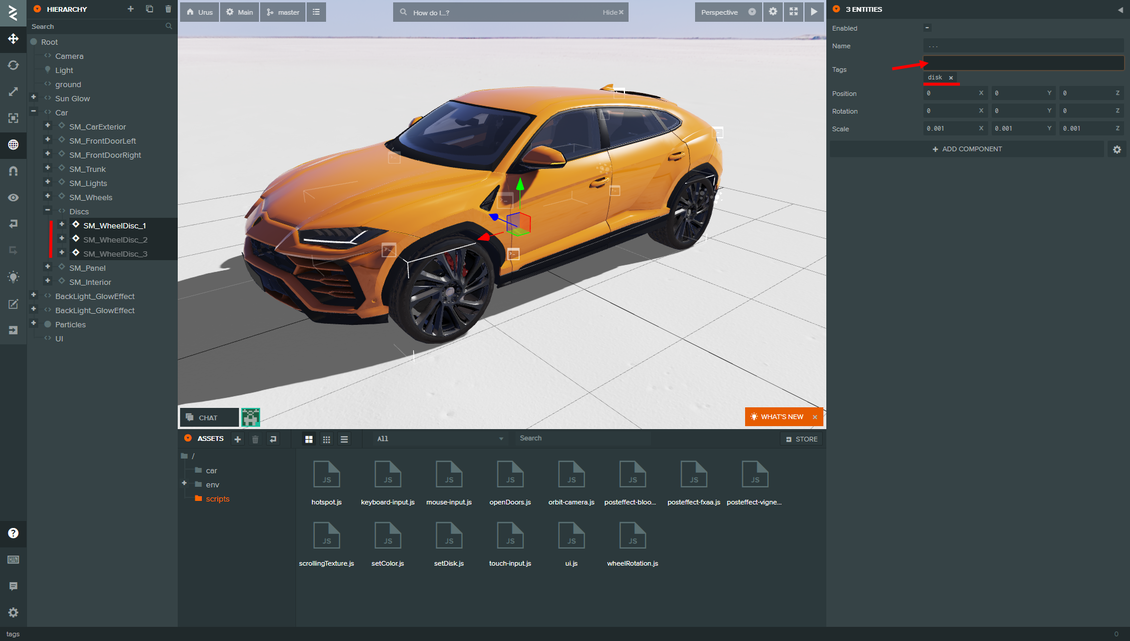
Apply the script to "Entity" - "Discs".
Select "Entity": "SM_WheeDisc_1", "SM_WheeDisc_2", "SM_WheeDisc_3". On the "Inspector" panel and add the "disk" tag. Don't forget to press Enter on your keyboard to add the tag.
Carpaint color change script
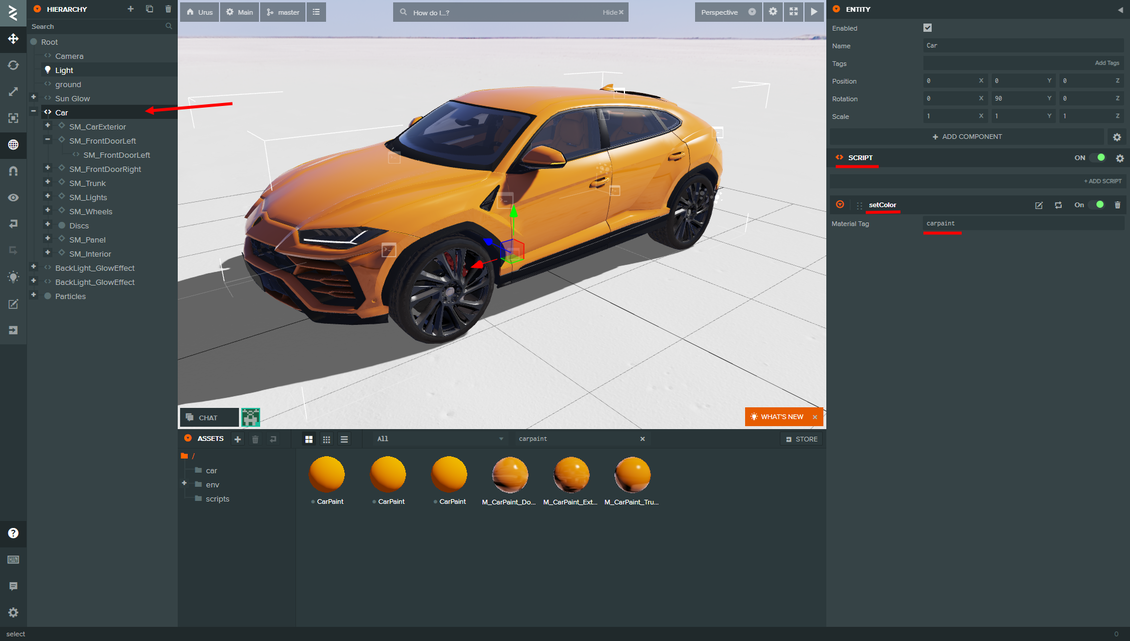
Download the "setColor.js" script and add it to your project under "Assets" → "scripts".
Apply the script to "Entity" - "Car". In the script settings, leave the "Material Tag" parameter equal to the default.
How this script works: when we generate an event to change color (pressing a button in the interface), for all materials that have the "carpaint" tag, "Diffuse" color will be changed to the one that we will transmit directly through this event.
Go to the "Assets" panel, in the search find all the materials of our "M_CarPaint....", select these materials and in the "Inspector" panel, in the "Tags" form, write the tag "carpaint ". Don't forget to press
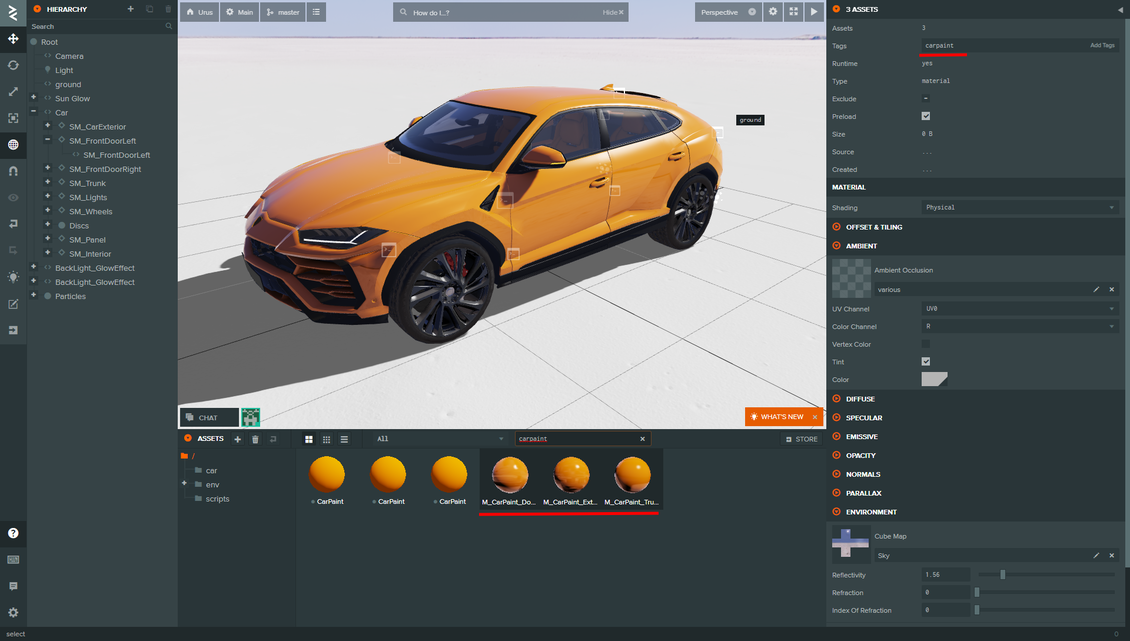
In the next step, we will create an interface and associate button clicks and colors.
Creating an interface
Create a new "Entity" in the "Hierarchy" panel named "UI". Then download the "ui.js" script and add it to the project in "Assets" → "scripts".
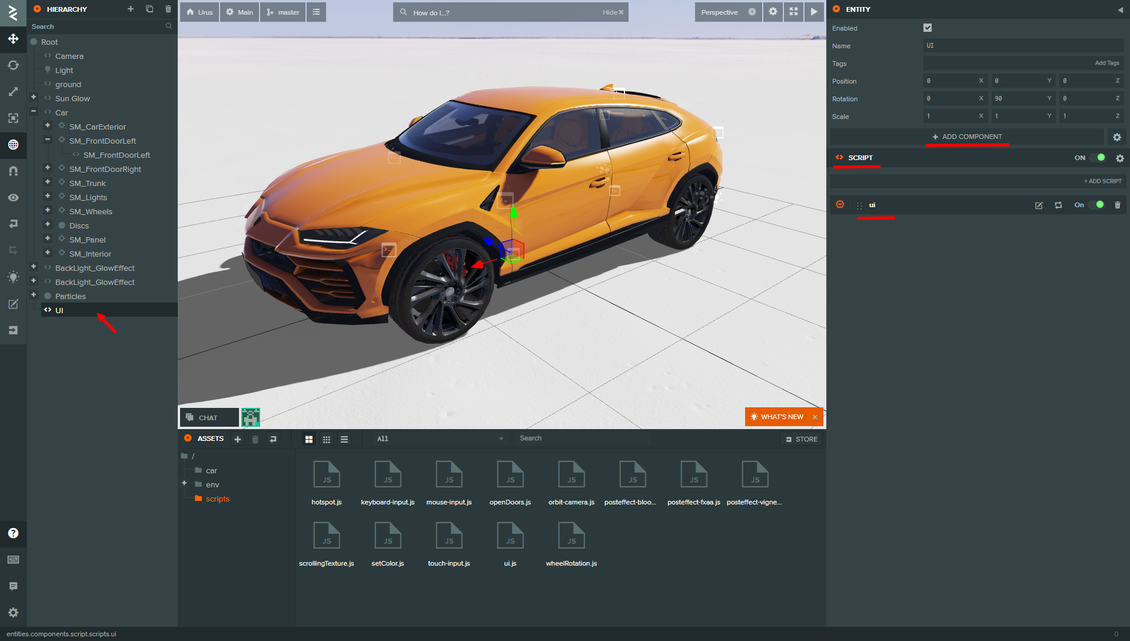
Assign "ui" script to "Entity" - "UI" by adding the "Script" component and selecting the suggested script from the list.
In this script, we create an interface using HTML code. By adding dynamically necessary "div" elements and defining "CSS" styles.
We will not describe the entire process in detail, since this is beyond the scope of this master class.
The principle is that we create a block in the center, at the bottom of the page, in which we add buttons for changing colors and additional buttons for changing disks and opening doors.
In this array, we determine what the colors of the buttons will be. "color" is the color to change in the material, and "hex" is the hexadecimal color code of the HTML button.
color: new pc.Color(255.0/255.0, 131.0/255.0, 0/255.0),
hex: "#ff8300"
},
{
color: new pc.Color(82.0/255.0, 176.0/255.0, 0/255.0),
hex: "#52b000"
},
{
color: new pc.Color(17.0/255.0, 74.0/255.0, 151.0/255.0),
hex: "#114a97"
},
{
color: new pc.Color(162.0/255.0, 24.0/255.0, 24.0/255.0),
hex: "#a21818"
}
];
The size of the buttons is set using this variable.
Buttons for opening doors and changing rims. Additional properties have also been defined here, such as the name of the button, the size of the icon, the icon itself, and the name of the event that is being sent.
name: 'Door',
icon: iconDoor,
iconSize: '90%',
action: 'opendoor',
tag: '',
data: ''
},
{
name: 'Wheel',
icon: iconWheel,
iconSize: 'contain',
action: 'setdisk',
tag: 'disk',
data: ''
}
];
The icons for the color change buttons are dynamically generated by creating a square "div" block with a background and "CSS" overlaid with a translucent gradient. There are no graphics at all here.
The buttons for opening doors and changing discs were drawn in Photopea in vector, then saved as "SVG", then the code from "SVG" was translated into "CSS" code.
var iconDoor = "url("data:image/svg+xml,%3Csvg version='1.2' baseProfile='tiny-ps' xmlns='http://www.w3.org/2000/svg' viewBox='0 0 164 165' width='164' height='165'%3E%3Ctitle%3Ecardoor%3C/title%3E%3Cstyle%3E tspan %7B white-space:pre %7D .s0 %7B fill: %23ffffff %7D %3C/style%3E%3Cpath fill-rule='evenodd' class='s0' d='m60.62 11.98c7.56-7.67 17.88-11.98 28.65-11.98h69.7c2.78 0 5.03 2.25 5.03 5.03v154.94c0 2.78-2.25 5.03-5.03 5.03h-121.71c-7.17 0-13.48-4.74-15.47-11.63l-20.35-70.43c-1.52-5.25-0.08-10.9 3.76-14.79l55.42-56.18zm50.05 81.59c0 3.33 2.7 6.04 6.04 6.04h21.13c3.33 0 6.04-2.7 6.04-6.04c0-3.33-2.7-6.04-6.04-6.04h-21.13c-3.33 0-6.04 2.7-6.04 6.04zm28.12-21.13c2.8 0 5.06-2.28 5.03-5.08l-0.43-41.73c-0.03-2.76-2.27-4.98-5.03-4.98h-44.91c-8.13 0-15.92 3.28-21.6 9.1l-31.67 32.44c-3.73 3.82-1.02 10.25 4.32 10.25h94.28z' /%3E%3C/svg%3E")";
Thus, we did not connect additional graphics, and all icons are implemented in the form of code.
On pressing the color change button, we call the "app.fire" function, in which we pass the name of the event and the color itself. We take the color dynamically from the "colors " array.
To open doors and change disks, we call the event dynamically, where we take the name of the event and the tag parameter from the "buttons" array.
Thus we connected the interface with other scripts. And we can remove or add new colors or buttons in arrays without changing the "ui " script code itself.
Note!
Pay attention to the fact that for the "setColor" script we specified the tag ourselves in the parameters, and for the "setDisk" script the tag is passed dynamically through an event. This is done on purpose, to demonstrate different approaches to the problem.
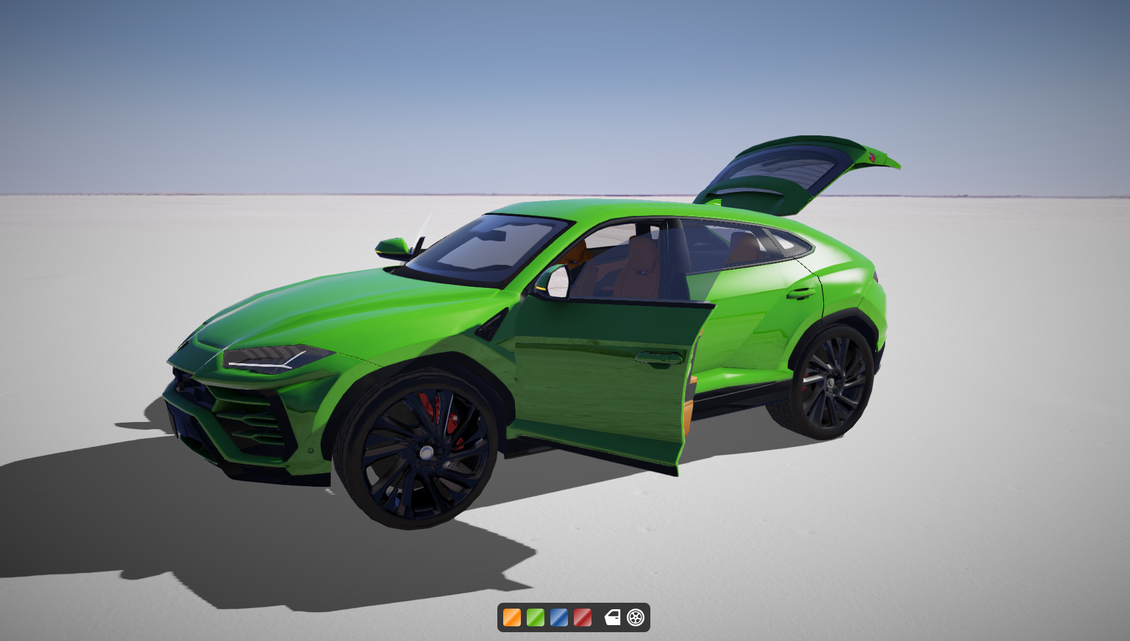
Result
Conclusion
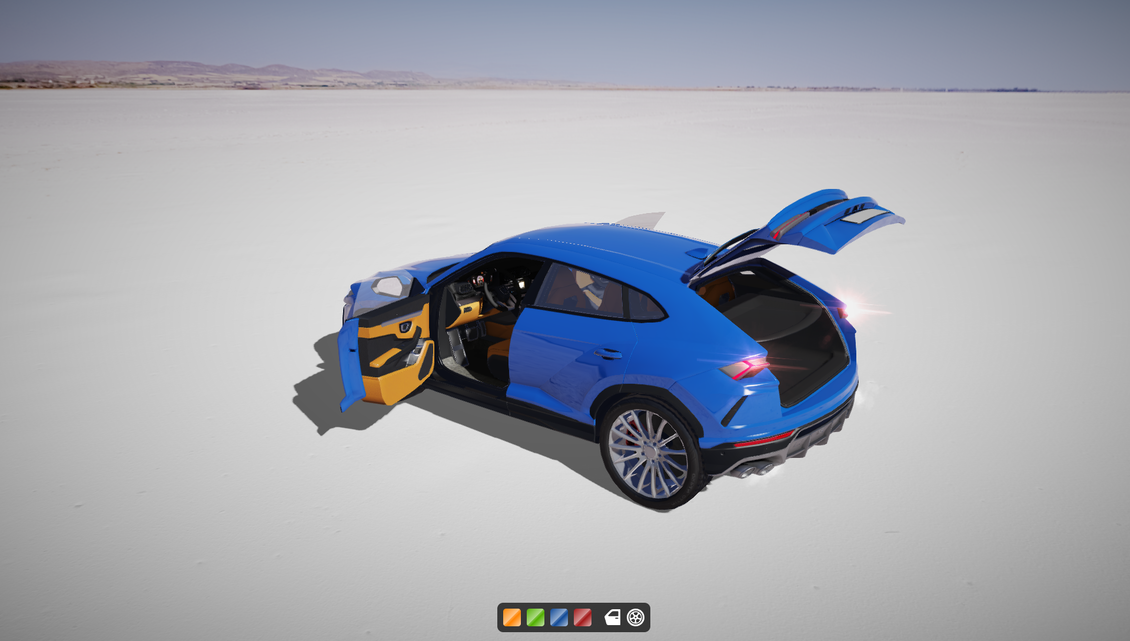
In this part, we added interactivity to our scene, made the interface and the project is complete. In the next part, we will improve the lighting, shadows and make the picture more attractive.


{{comment.text}}