 English
 Intro Part 10
This is Part 10 of the tutorial series on building a Lamborghini Urus with WebGL/PlayCanvas.
For those who haven't read the previous parts, here's a demo video.
This is the final part of a series of tutorials on creating a scene in Playcanvas/WebGL using the Lamborghini Urus as an example. In this part we will work a little on the lighting to make it more pleasing to the eye.
Access to materials such as "FBX" models, textures, "AO" baked maps and more, you can get by subscribing to Patreon.
Patreon - 3DGROUNDInterior lighting
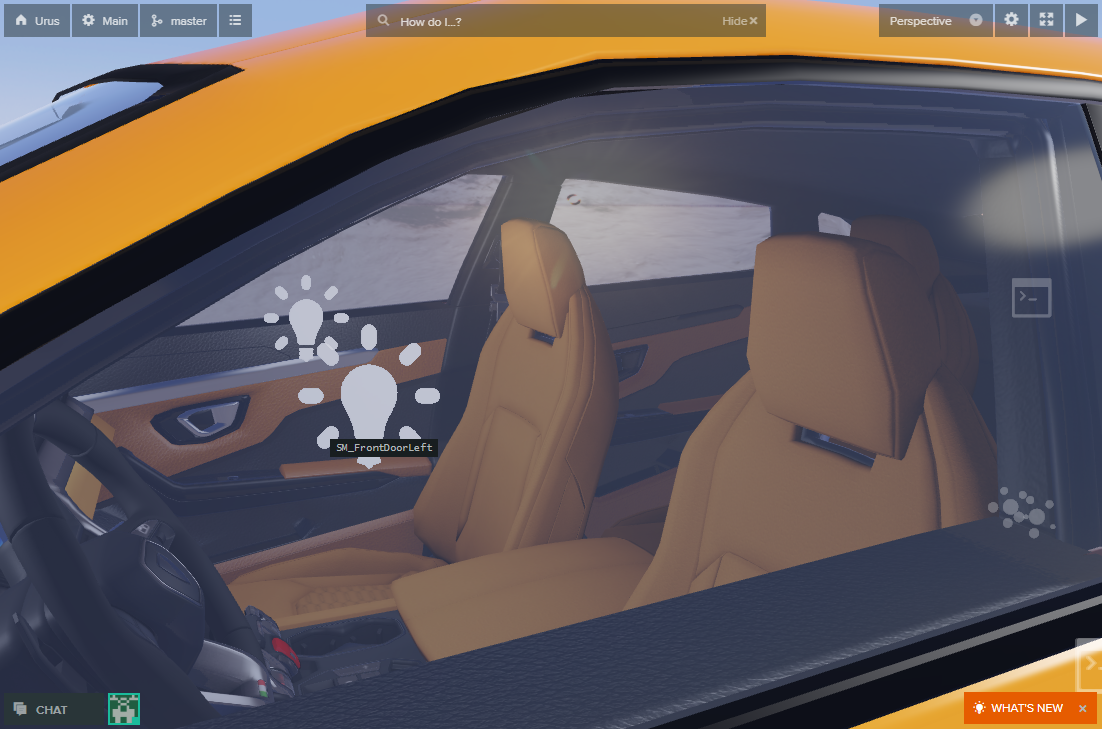
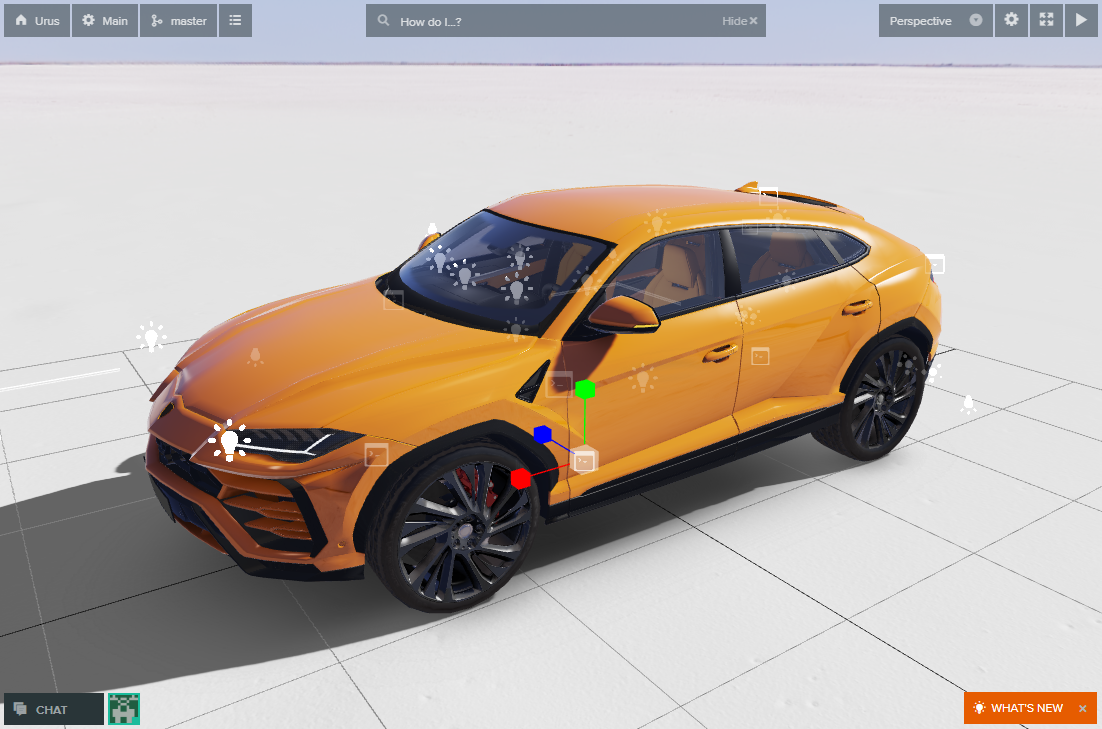
First, let's highlight the dashboard. To do this, create a "Point Light" with the following settings:
- Intensity: 0.4
- Range: 0.5
- Falloff Mode: Inverse Squared
Make two more copies and place above the dashboard. The central lamp can be made a little brighter: "0.6".

We make two more copies of the lamps, place them at the chest level of the driver and passenger, with the settings:
- Intensity: 0.2
- Range: 1.0
- Falloff Mode: Inverse Squared
Once again we duplicate the lamp and move it closer to the bottom of the seat, at the level of the driver's thigh. Settings:
- Intensity: 0.12
- Range: 1.0
- Falloff Mode: Inverse Squared
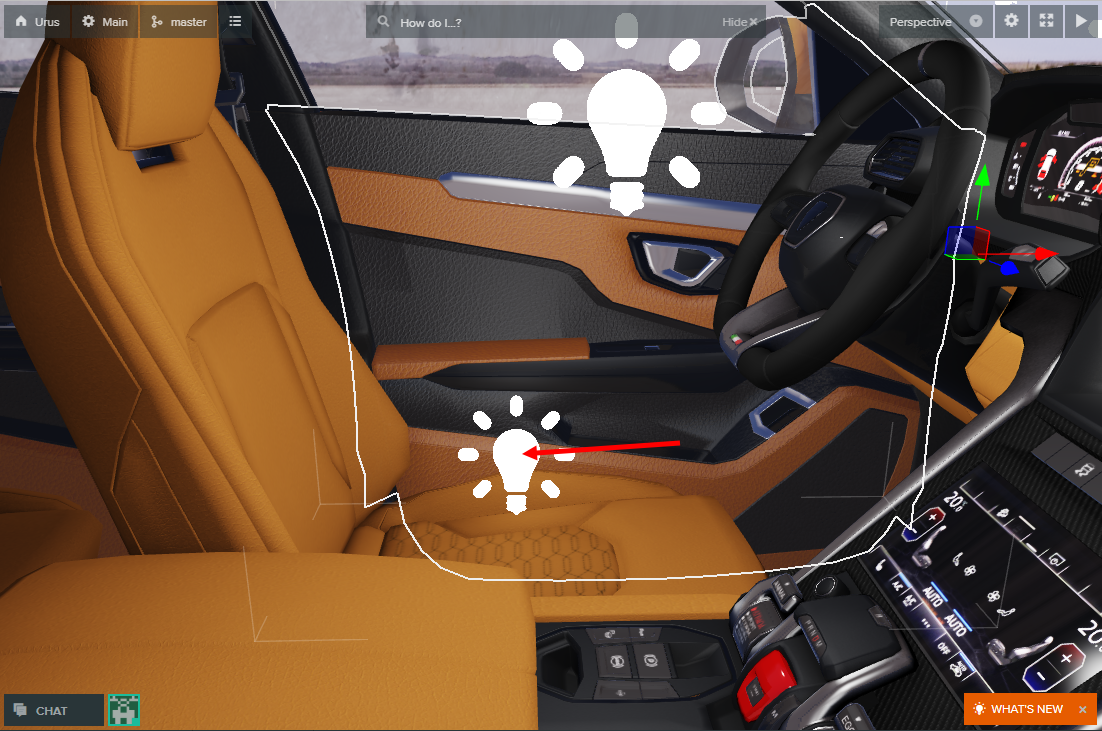
Duplicate again and move to the opposite side to the passenger.
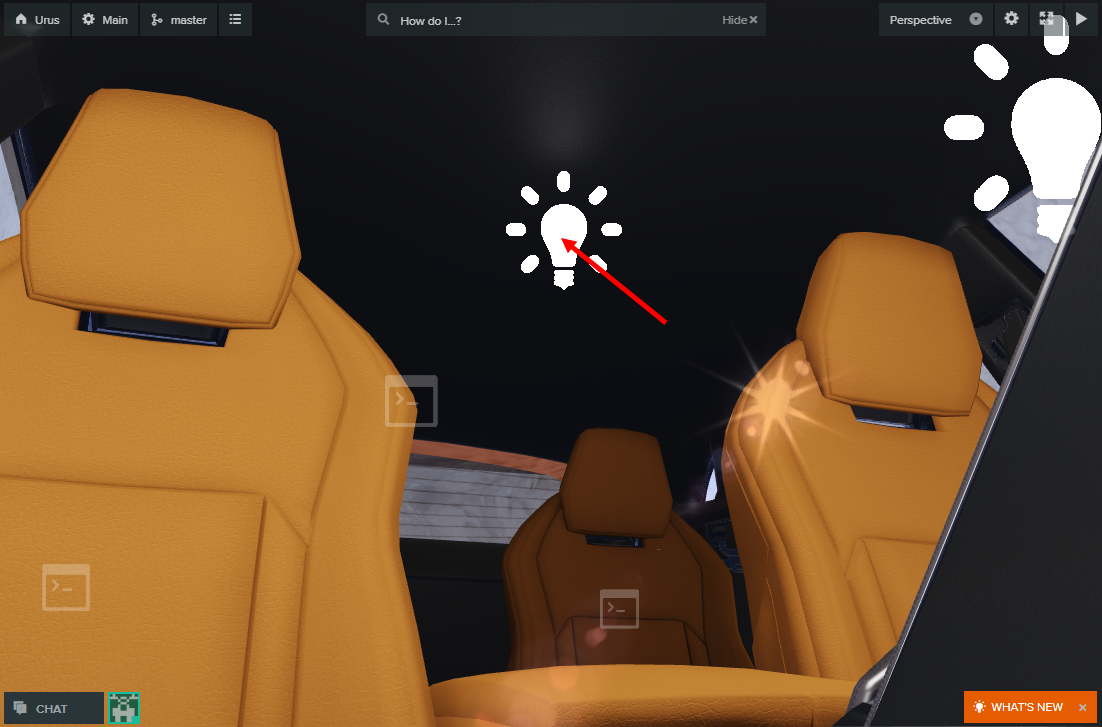
Let's create and place "Point Light", where a lamp is usually placed on the ceiling in the salon by default. Settings:
- Intensity: 0.5
- Range: 1.0
- Falloff Mode: Linear
Create and place two more "Point Light" lights in the trunk of the car. In this way:

Top light settings:
- Intensity: 0.2
- Range: 2.0
- Falloff Mode: Inverse Squared
Bottom light settings:
- Item 1
- Item 2
Exterior lighting
Create two "Point Lights" and place them at the level of the headlights, slightly moving forward. Settings:
- Intensity: 0.4
- Range: 1.0
- Falloff Mode: Linear

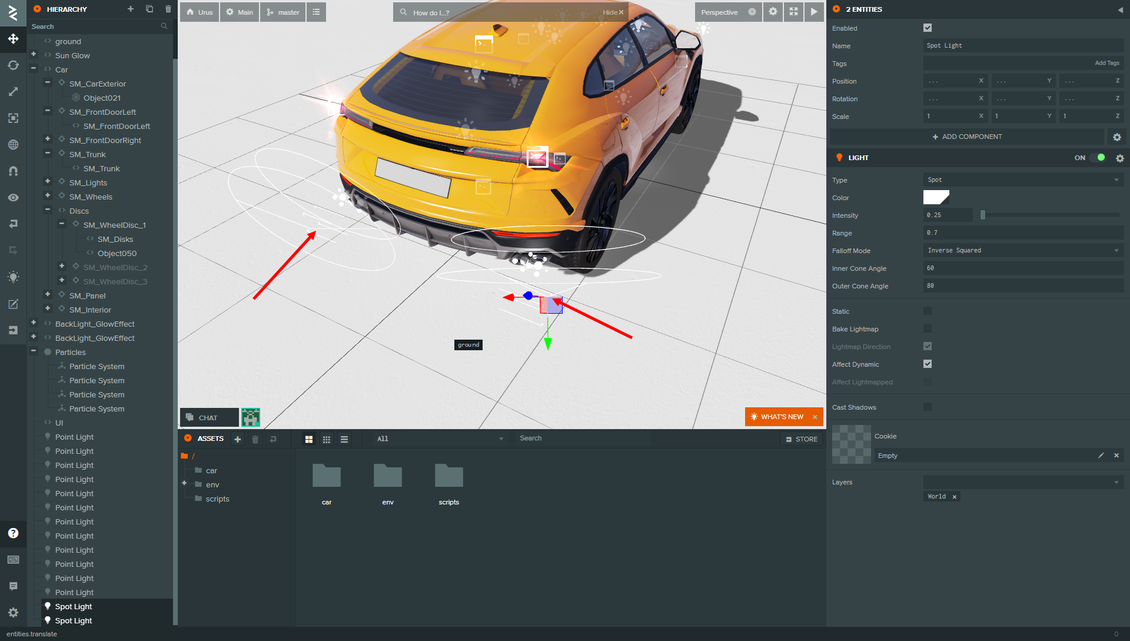
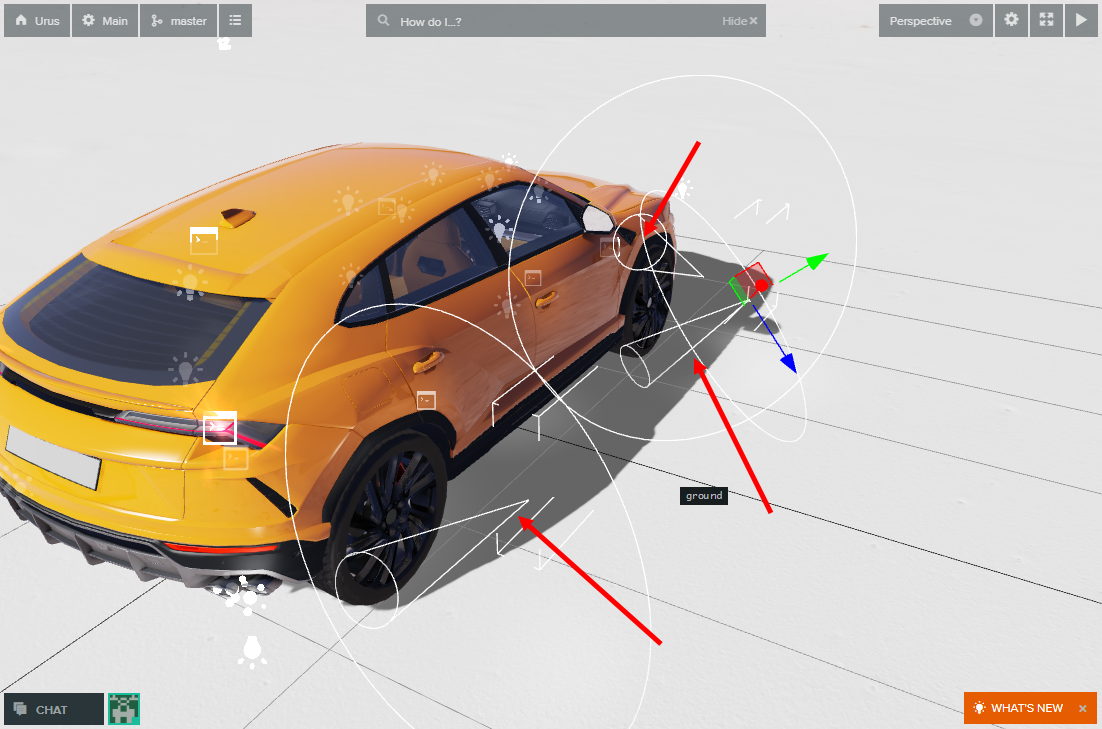
Create two "Spot Lights", move to the back of the car, adjust the angle of illumination and turn the lights as shown in the screenshot below. Settings:
- Intensity: 0.25
- Range: 0.7
- Falloff Mode: Inverse Squared
- Inner Cone Angle: 60
- Outer Cone Angle: 80
Illuminate the shadow side of the car with three more "Spot Lights". Let's highlight the wheels and the side mirror area.
The settings are the same for the three "Spot Light":
- Intensity: 0.32
- Range: 0.1
- Falloff Mode: Inverse Squared
- Inner Cone Angle: 80
- Outer Cone Angle: 10
Some more improvements
Look at the shadow under the car - it is quite flat, there is no feeling that global illumination is involved. There is not enough additional shadow from the sky.
Since Playcanvas can't calculate lighting according to real laws of physics, we'll have to "fake" the shadow.
We will create a plane with a transparent texture in the form of a shadow, and we will raise this plane a little above the ground.
To draw such a shadow, go to the "Bottom" view, take a screenshot of "Viewport" and draw the shadow in Photopea or Photoshop. Don't forget that the aspect ratio of the texture should be 1:1.
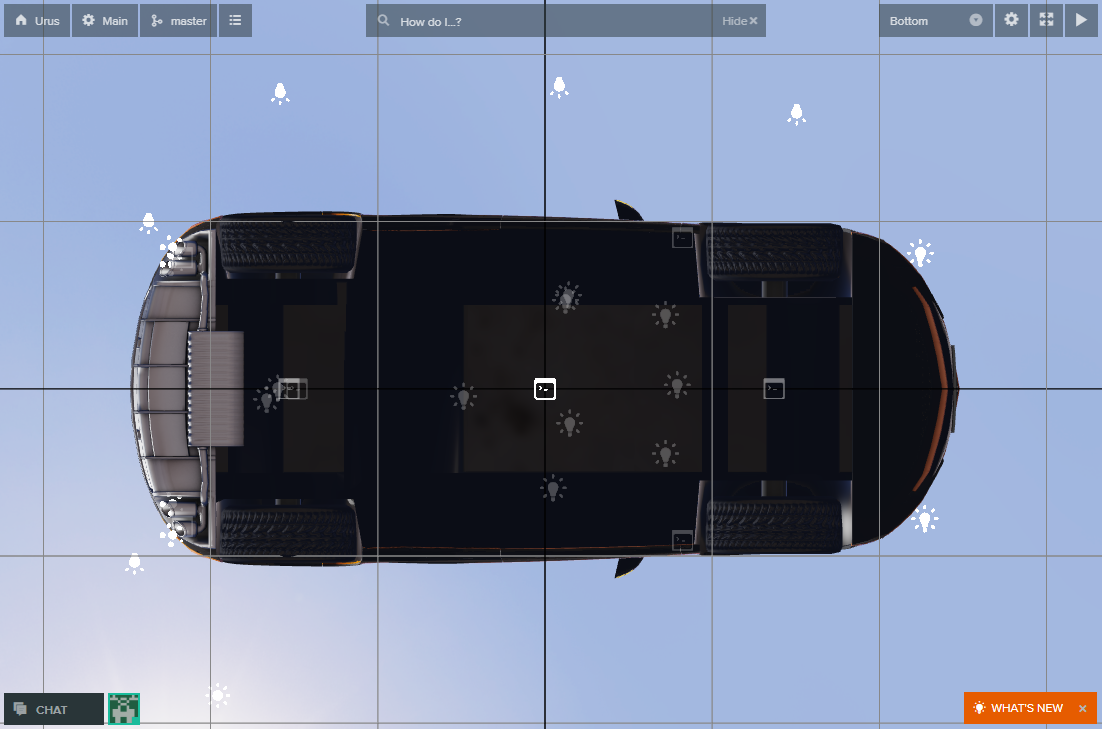
I got it like this.

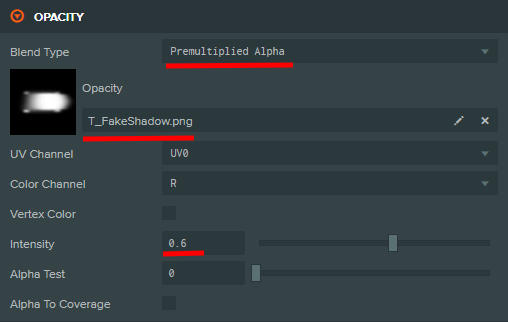
Create the "M_FakeShadow" material with the following settings.
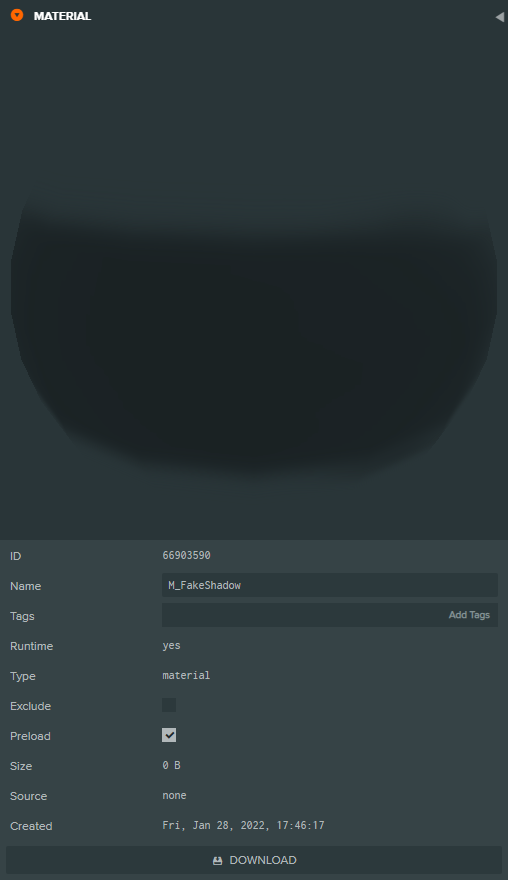
Create a "Plane", raise the "Y" axis above the ground by "0.01", apply the "M_FakeShadow" material to it, adjust the scale of the plane so that the shadow coincides with the car.
Conclusion
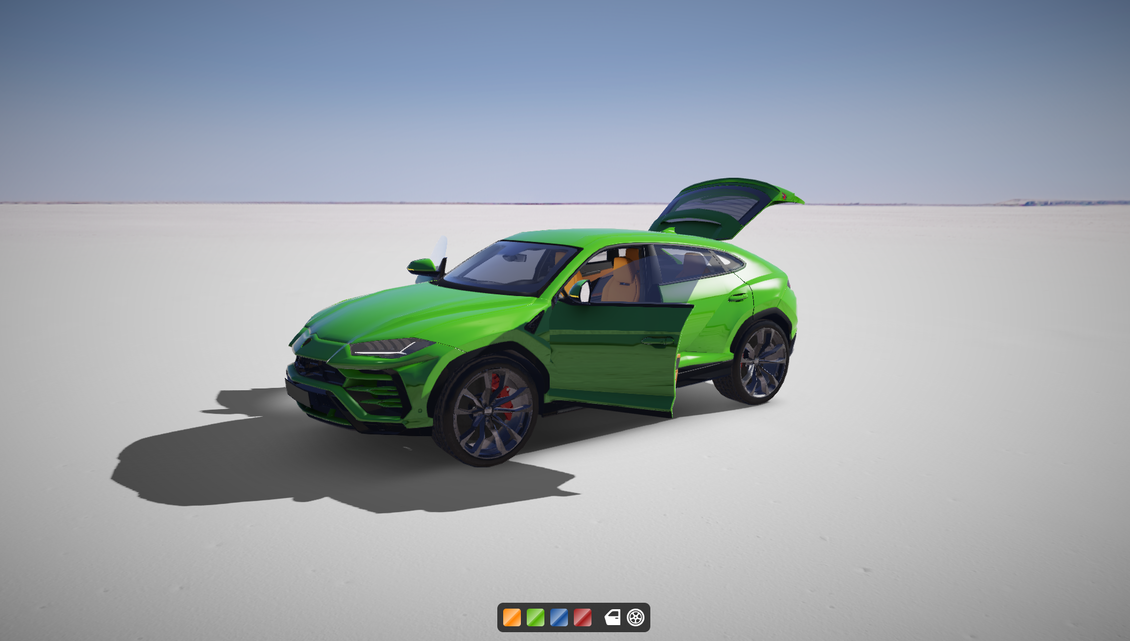
Click the "Play" button, let's admire our result. It turned out great, we did a great job!
Thanks to everyone who supported me on Patreon, it helps to release new cool lessons.
I hope you enjoyed this tutorial, I look forward to your feedback in the comments 👍.


{{comment.text}}