 English
 Intro Part 8
This is Part 8 of the tutorial series on building a Lamborghini Urus with WebGL/PlayCanvas.
For those who haven't read the previous parts, here's a demo video.
In this part of the tutorial, we will add a car interior to the scene and set up materials for it.
Access to materials such as "FBX" models, textures, "AO" baked maps and more, you can get by subscribing to Patreon.
Patreon - 3DGROUNDDashboard
Let's add an object to the scene "SM_Panel", by analogy with the previous part of the lesson. Drag the "FBX" file to the "Assets" → "car" panel. Then "Template" with the name "SM_Panel" is dragged onto the "Hierarchy" → "Car" panel.
To make it easier for you to work with this leftover, select all unnecessary elements of the car and uncheck "Enabled" on the "Inspector" panel. This way you will hide the objects.

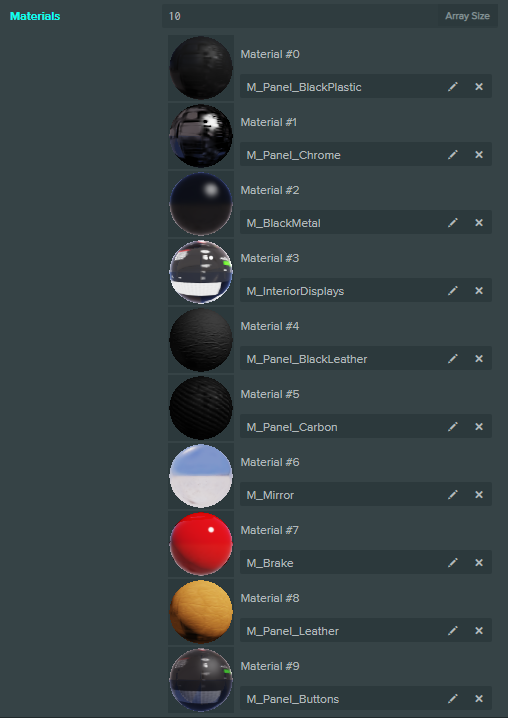
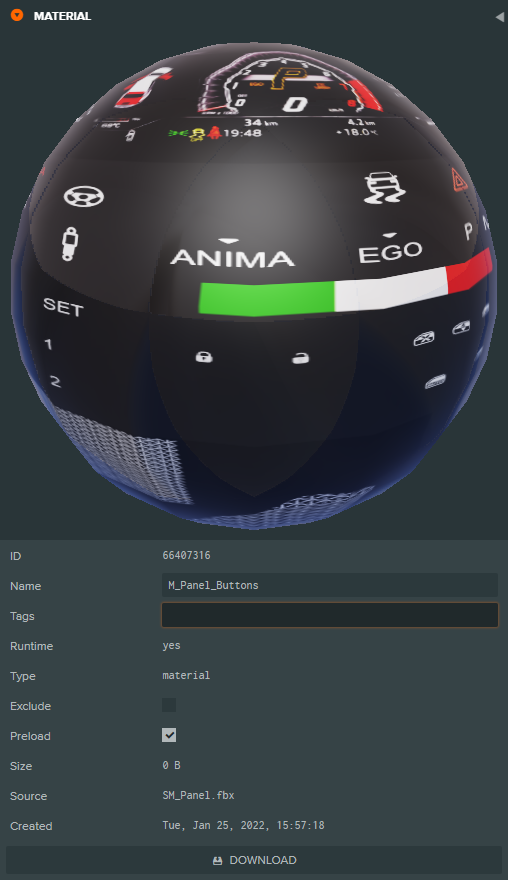
We will create almost all materials from scratch, with the exception of "M_BlackMetal" - slot 3, "M_Mirror" - slot 5 and "M_Brake" - slot 6.
Material M_Panel_BlackPlastic


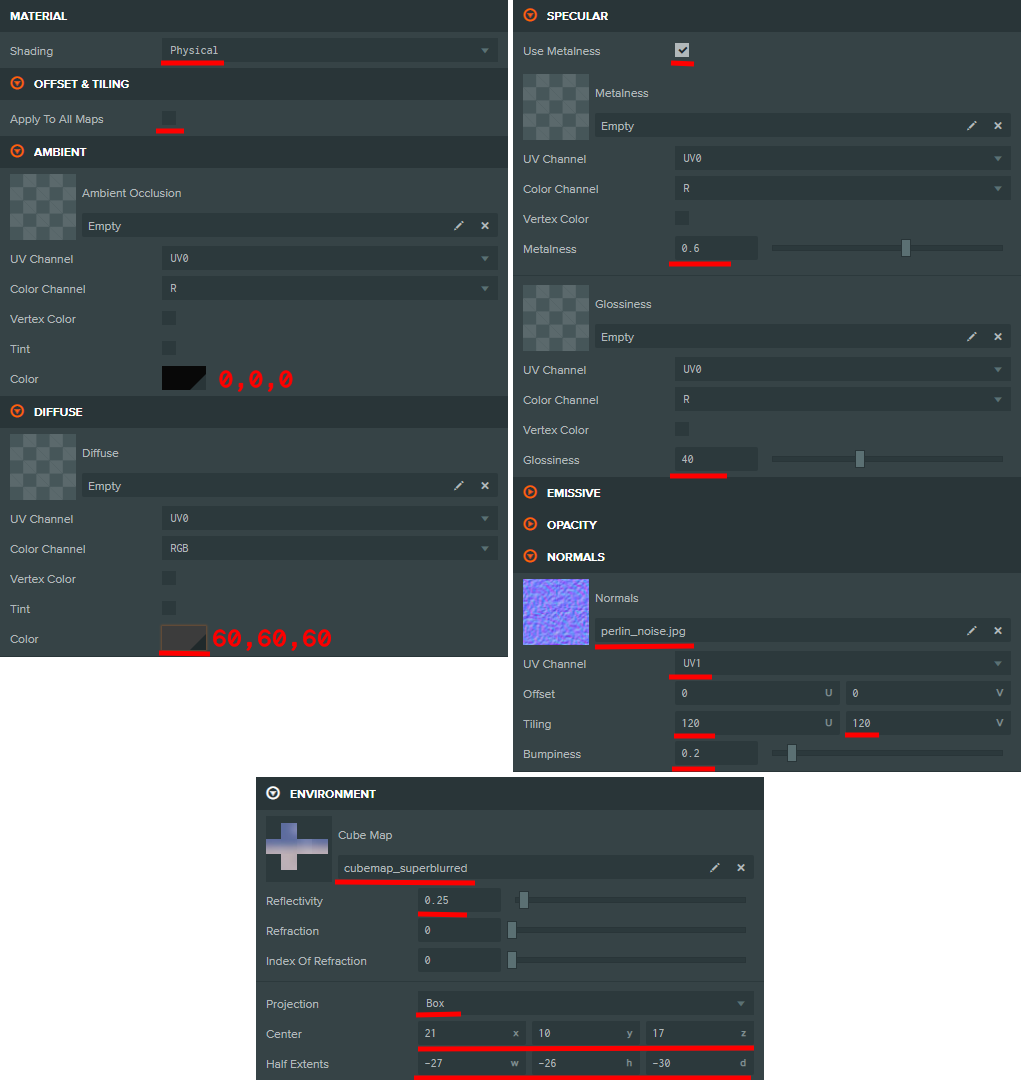
Material Panel_Chrome
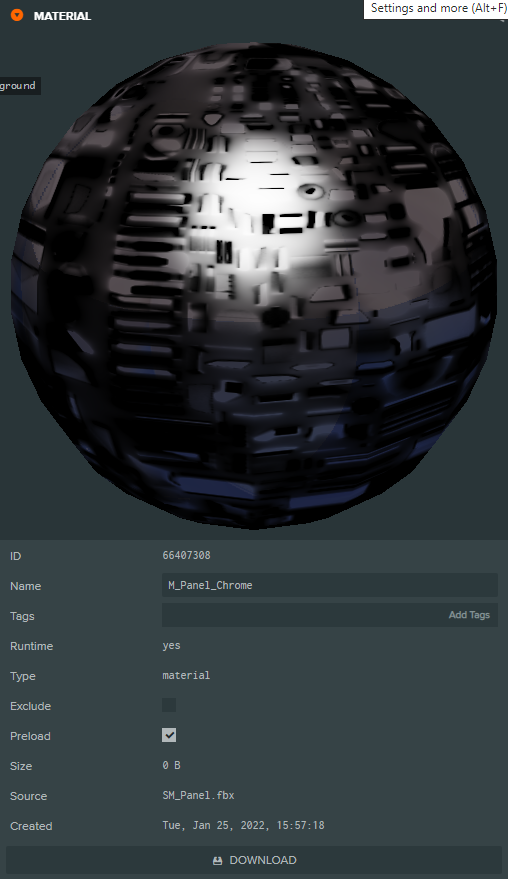
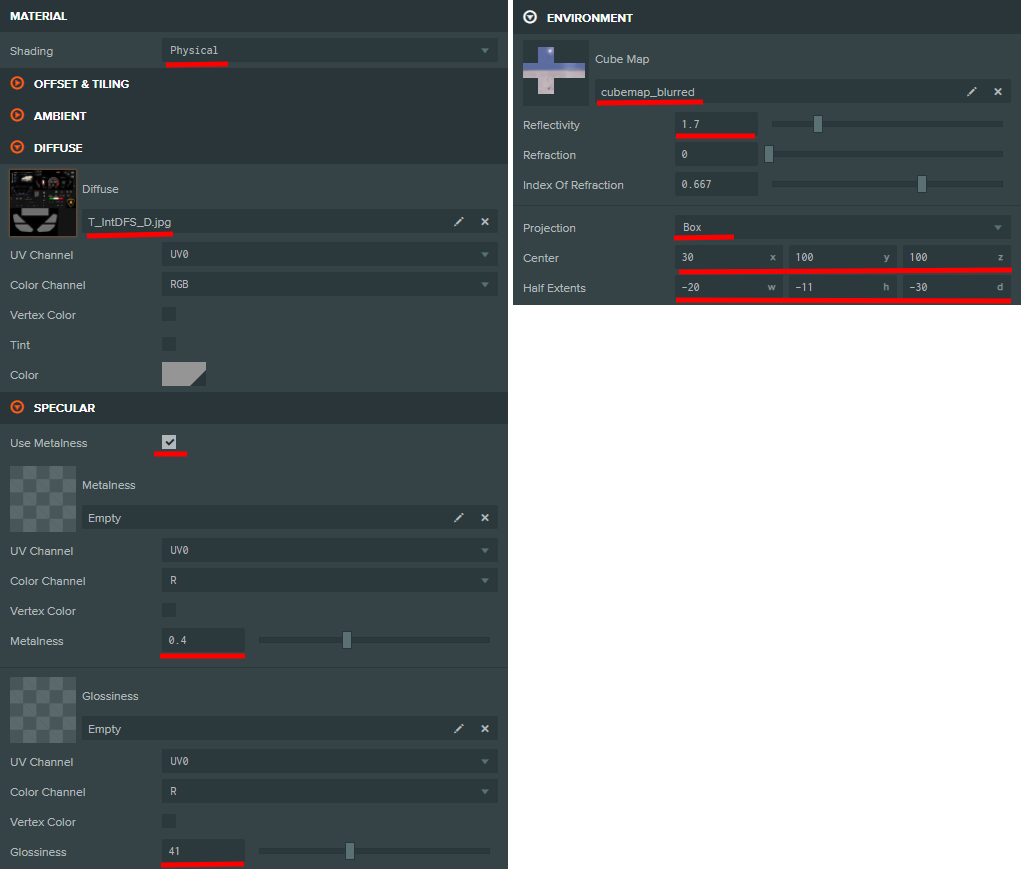
In this material, I want to focus on the "Environment" convolution. Here the "Projection" mode is switched to "Box", and "Center" and "Half Extents" are changed in order to achieve an interesting effect in the highlights - smeared stripes at 30-40 degrees.

Material InteriorDisplays


Material Panel_BlackLeather


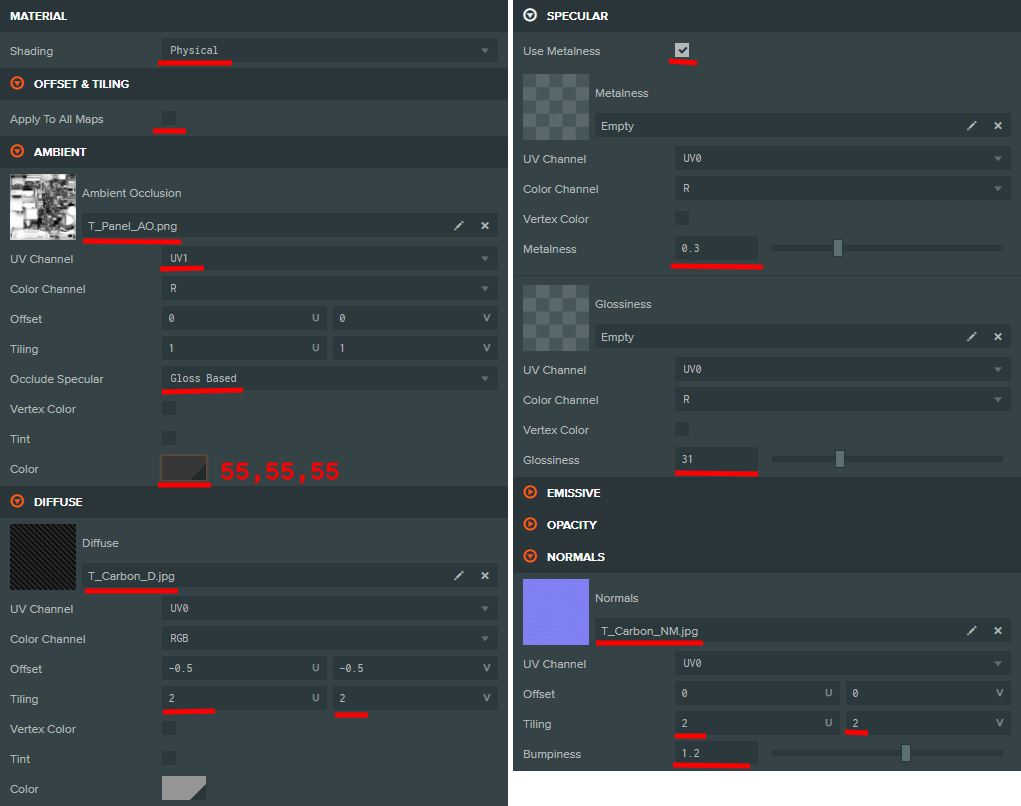
Material Panel_Carbon

Material Panel_Leather


Result
Interior
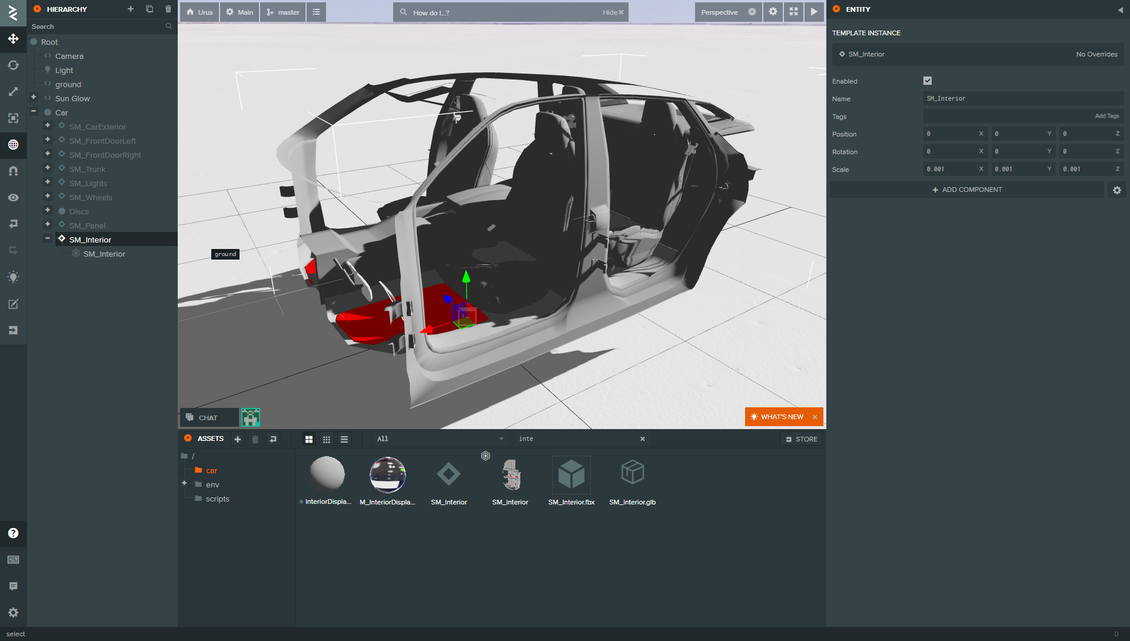
Let's add an object to the scene "SM_Interior". Drag the "FBX" file to the "Assets" → "car" panel. Then "Template" named "SM_Interior" is dragged to the "Hierarchy" → "Car" panel.
Material "M_BlackMetal" - 4th slot and "M_ChromeClearDark" - 3rd slot, take from the ready ones. All other materials will be created from scratch.
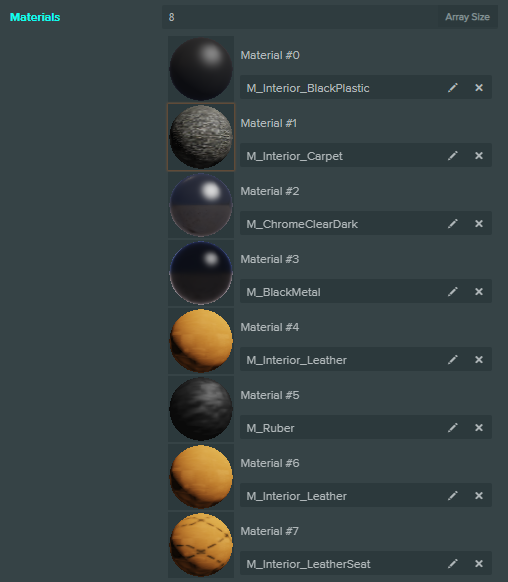
Material Interior_BlackPlastic

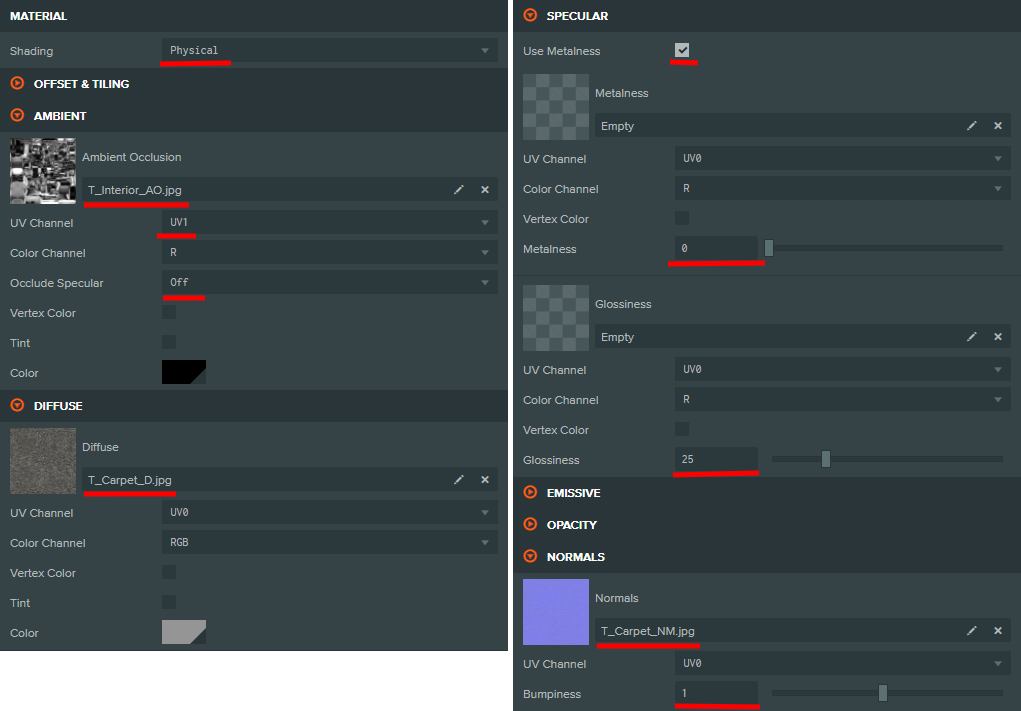
Material Interior_Carpet

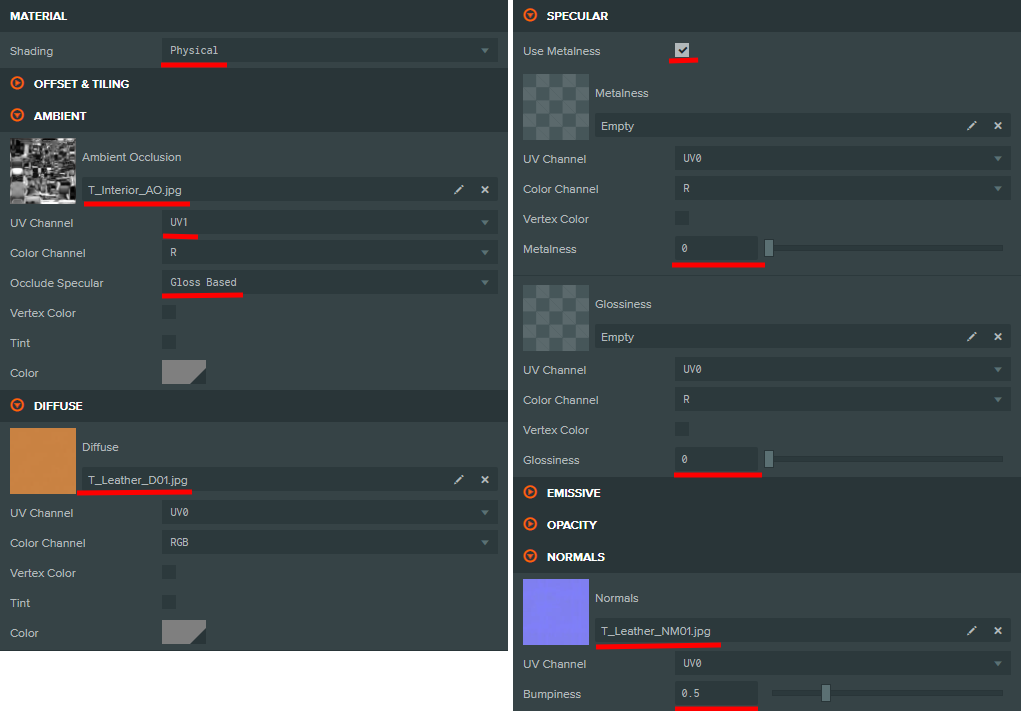
Material Interior_Leather

Please note that this material is installed on slots 5 and 7.
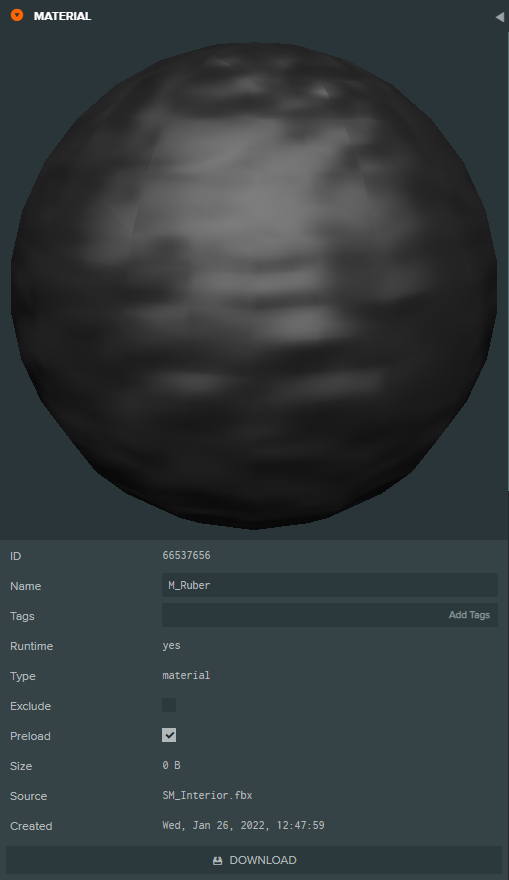
Material Rubber

Material Interior_LeatherSeat


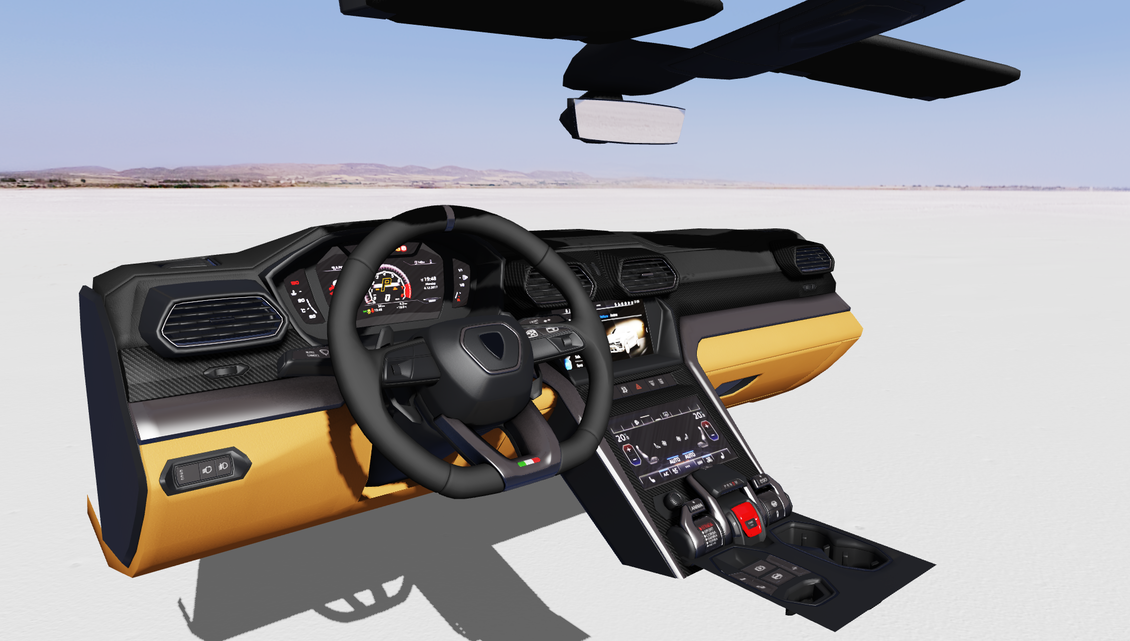
Result

Glow of the taillights

Create an empty "Entity" in "Hierarchy" → "Root" with the name "BackLight_GlowEffect", add the usual "Plane" to it. Let's rotate "Plane" by "-90" degrees along the "X" axis. Set "Scale" on all axes equal to "0.7".

Also disable "Cast Shadows", "Cast Lightmap Shadows", "Receive Shadows" properties for "Plane".
Now, for "Plane" let's create and apply a material named "GlowEffect". To create a material, call the context menu on the "Assets" panel and select "Material".
Apply the settings for the material, as shown in the screenshot below.

Move "BackLight_GlowEffect" to the left taillight and rotate "Y" axis by "90" degrees.

Fine. It remains to add "Component" - "Script" and assign as a script the already existing "hotspot", which we applied to the sun.

For "hotspot" in the "Camera Entity" settings, select the "Camera" object. Duplicate "BackLight_GlowEffect" and move it to the right for the right rear light.
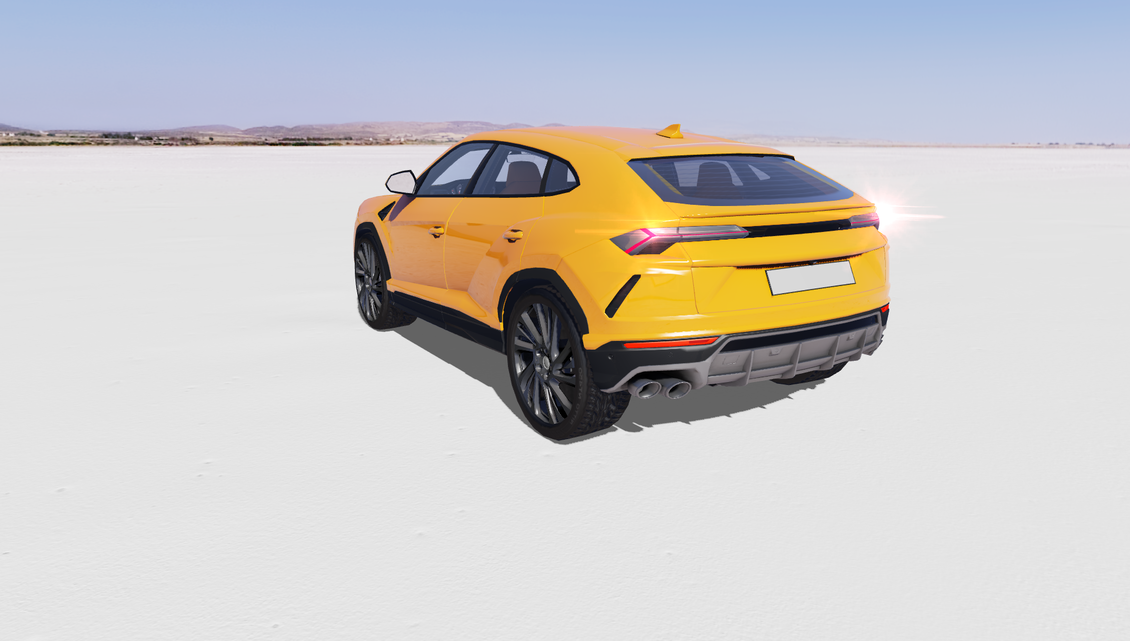
If you start the project on the "Play" button, you can see if we move the camera view to the back of the car, a glow effect appears. But, if the camera view is directed to the front of the car, thanks to the script, the glow effect disappears.
Result
Camera settings

As you can see, by pressing the "Play" button, the default camera view flies away from the scene. Now we will correct this situation.

Select the "Camera" object on the "Hierarchy" panel, use the "Move" tool and "Rotate", set the desired view from the camera. Then, in the settings on the "Inspector" panel, make the settings as shown in the screenshot above.
For the "orbitCamera" script, set the maximum and minimum angle "80" and "2" degrees, so that it is impossible to "fall through" the camera through the ground. "Inertia Factor" - will add smoothness of torsion to the camera. And for "Focus Entity", select our "Entity" - "Car" so that the view is "nailed" to our car.
We press "Play" - and the car is in the center of the frame, we do not fall through the ground when spinning, and spinning has become more pleasant in itself.

Additional scripts for Camera
Let's add some camera scripts from the free Playcanvas asset store.
To do this, click the "Store" button on the "Assets" panel.
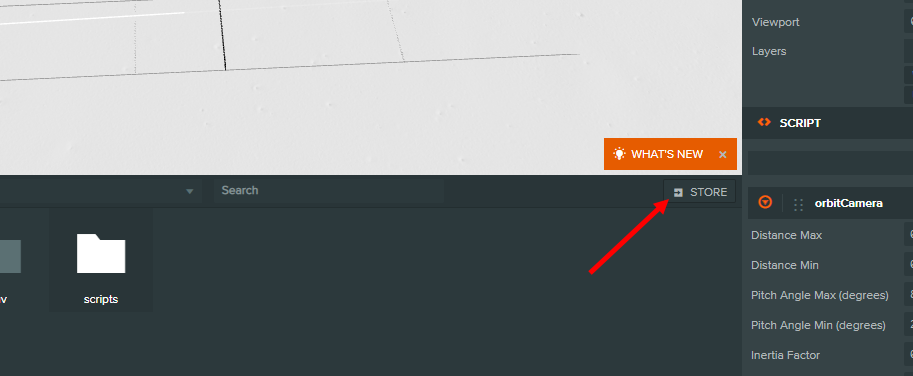
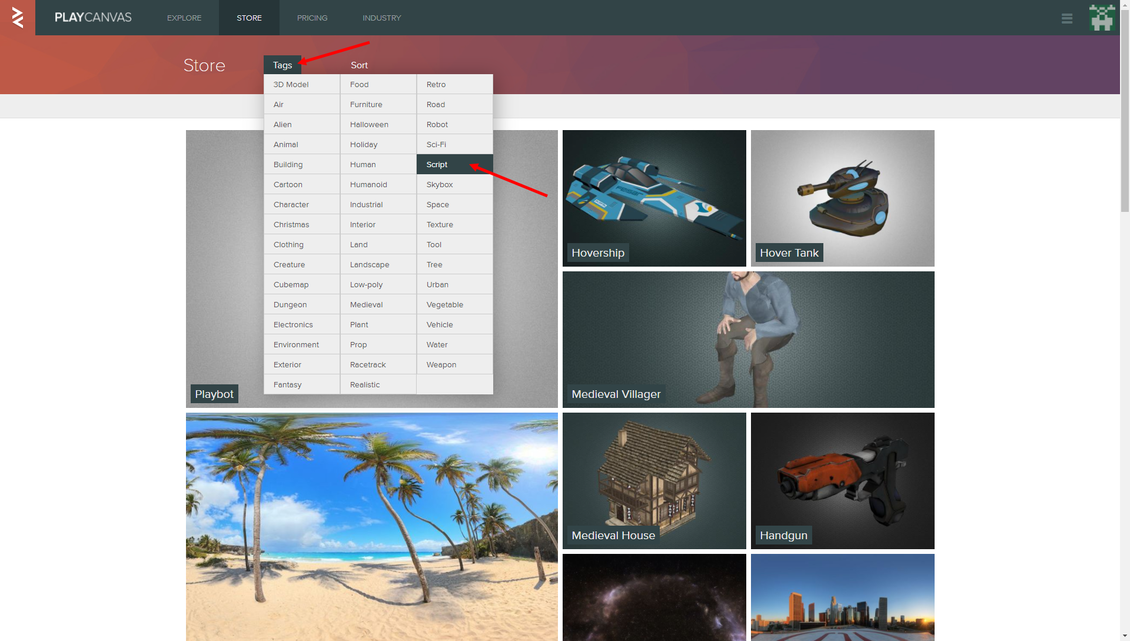
On the "Store" page, sort the content by the "Script" tag.
Add the following scripts: "Vignette Post Effect", "Bloom Post Effect", "FXAA Post Effect".

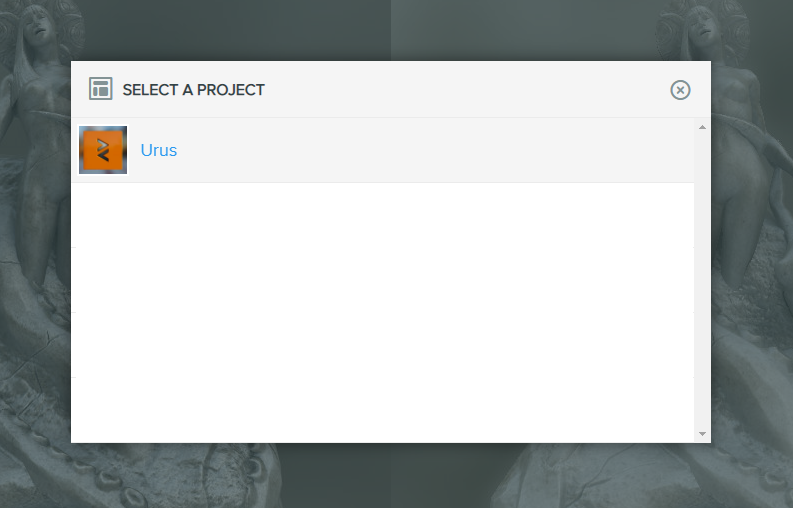
Click on the script card, then click the "Download" button and select your project.

And so, for each listed script. This addition of frequently used effects, scripts and assets is very convenient, for which many thanks to the Playcanvas developers.
We return to our project. You should have three scripts in the root of the "Assets" panel. Drag them to the "scripts" folder.
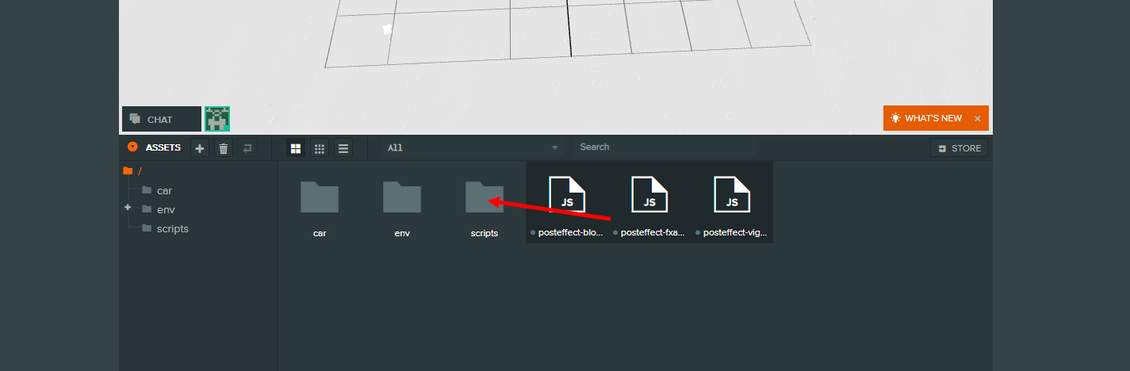
Select the "Camera" object on the "Hierarchy" panel, add new scripts from the "Add script" list: "fxaa", "bloom", "vignette" on the "Inspector" panel ".

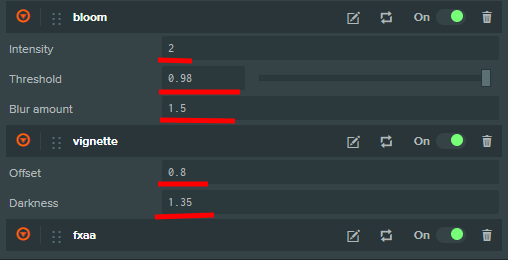
Set the script options as shown in the screenshot below.
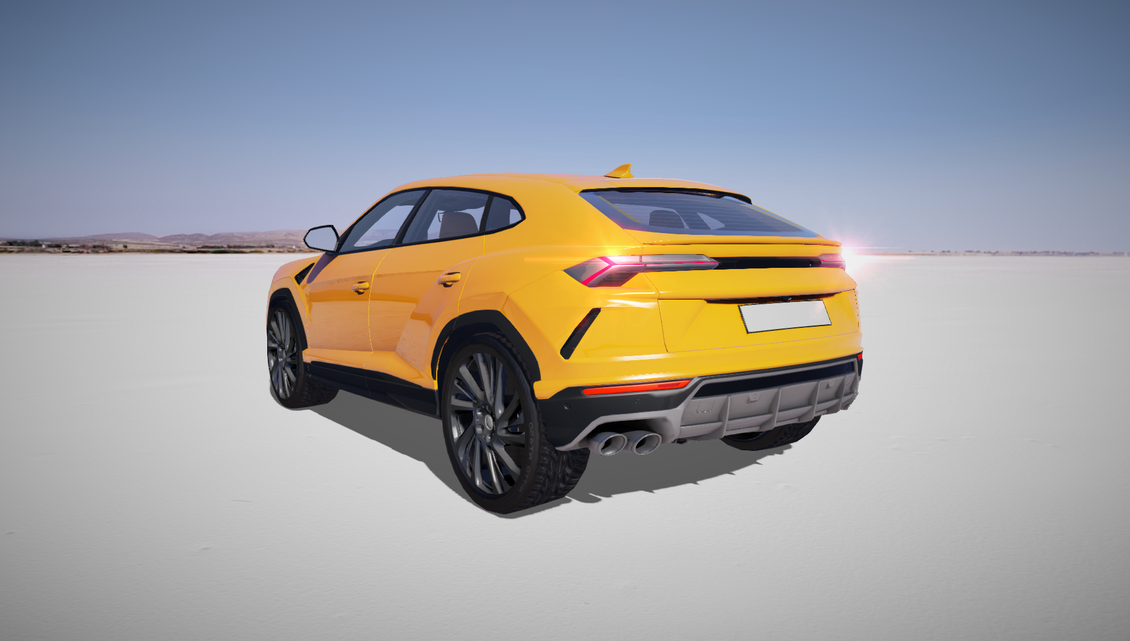
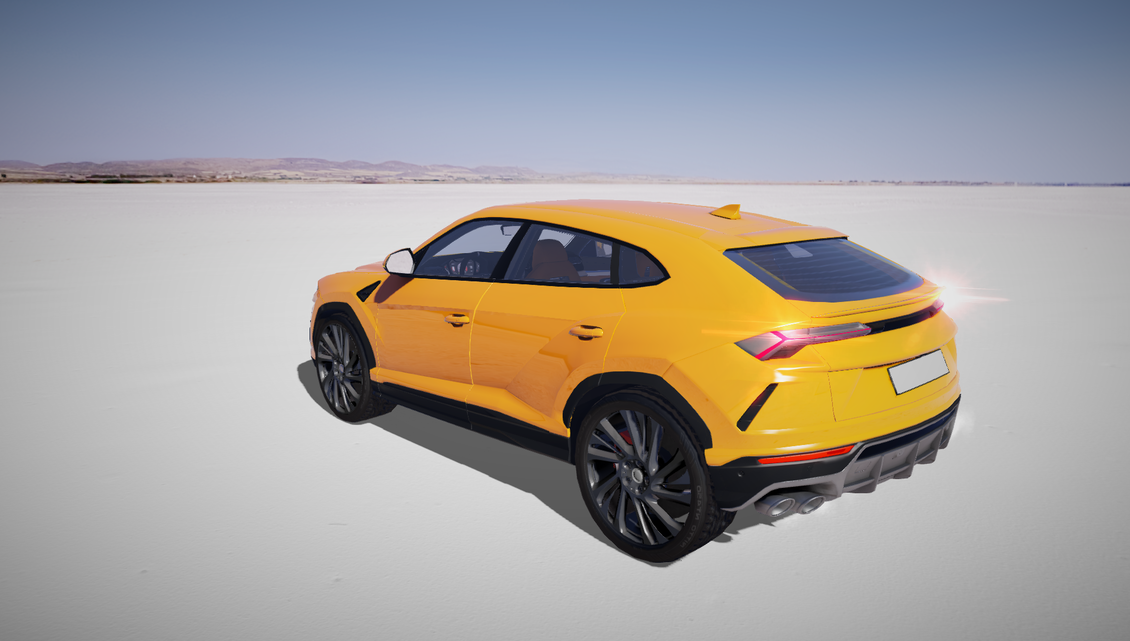
Result
As you can see, there is a vignette around the edges, the Antialiasing is a bit better and the glow effect is more pronounced.
Exhaust effect
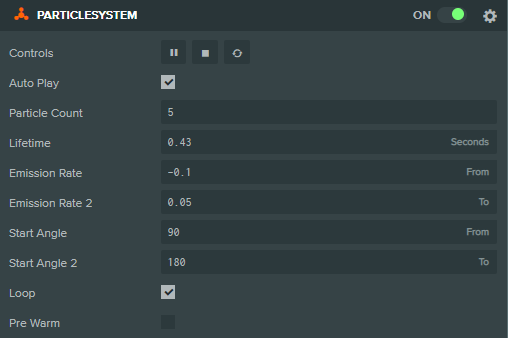
Playcanvas has a Particles system, thanks to which you can create interactive effects.

Create an empty "Entity" and name it "Particles", add "Particle System" to it. Move it to the left extreme exhaust pipe.
As the "smoke" texture, we will use this texture.

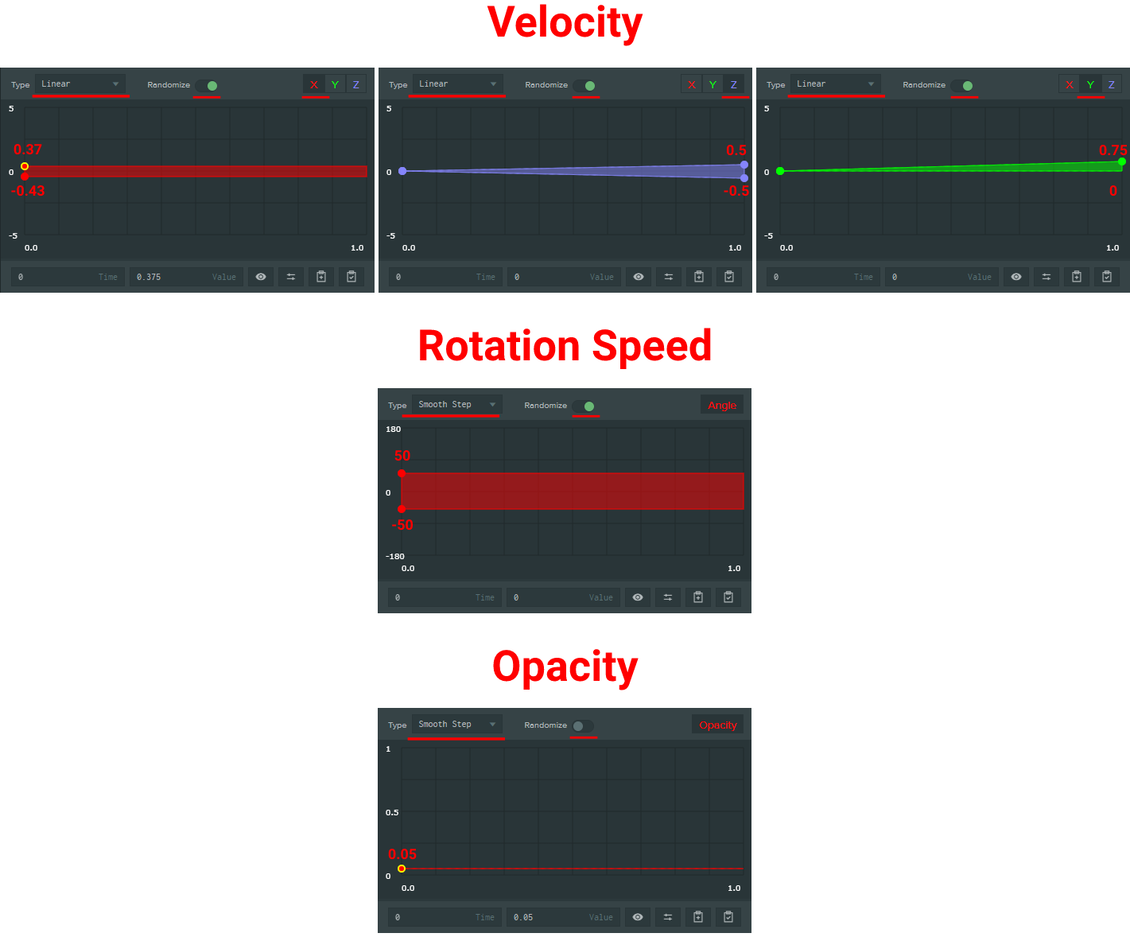
My setup example.
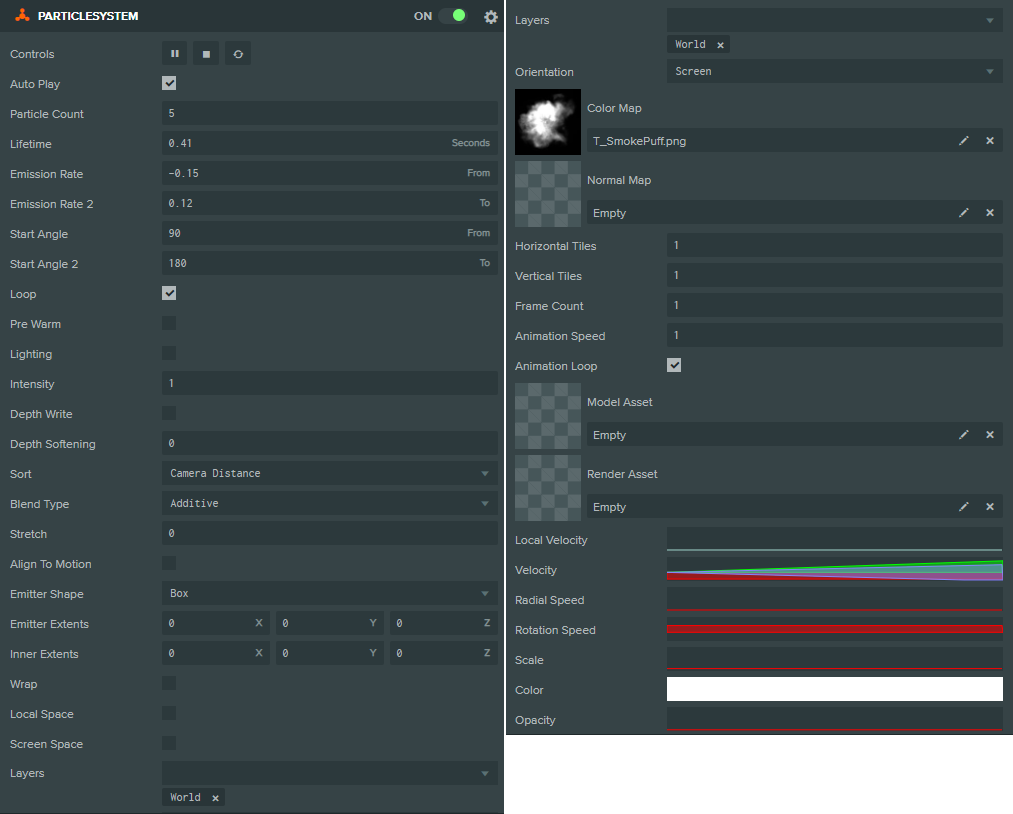
Graphs "Velocity", "Radial Speed", "Opacity".
Make a duplicate of "Particle System", and move it a bit to the right. Let's set the following settings.
Great, now we'll duplicate these two "Particle System" and move them to the right to the other exhaust pipes.
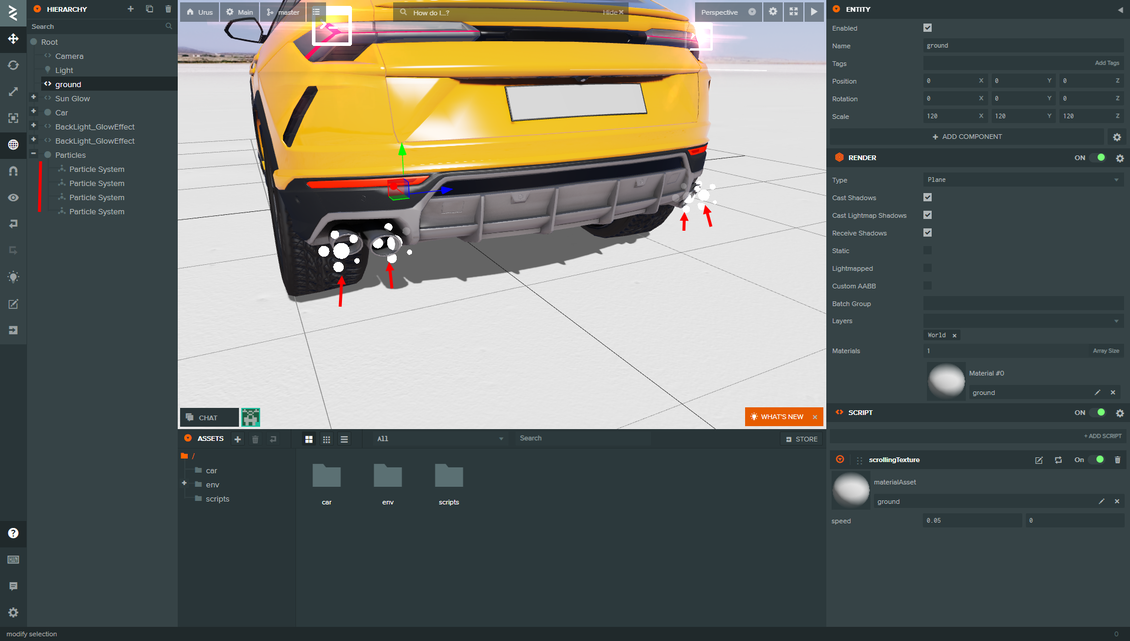
Result

Conclusion
In this part of the tutorial, we are completely done with adding geometry and setting up materials, making the taillight glow effect, and setting up the camera and particle system.
In the next part of the tutorial, we will add even more interactivity and improve the lighting.


{{comment.text}}