

Creation of the Lamborghini Urus project (WebGL-PlayCanvas). Part 2.



Intro Part 2
This is Part 2 of the tutorial series on building a Lamborghini Urus with WebGL/PlayCanvas.
So, in the previous part, we got acquainted with what WebGL is, tried the PlayCanvas web game engine in practice, created a project and started setting up the environment.
We've covered some of the PlayCanvas basics without which we can't move forward, namely commonly used hotkeys, interface structure, project types, where to find documentation, and basic project settings.
For those who haven't read the previous parts, here's a demo video.
In this part of the tutorial, we will continue creating the environment and figure out how to replace the background with a different one.
In this tutorial series, we won't be using any third party software other than Autodesk 3Ds Max to prepare the model. All tools are free web services: PlayCanvas, Photopea, Matheowis and more...
Well, are you ready? Then let's start...
Background preparation
Access to materials, such as: models in the format "FBX", textures, baked maps "AO" and more, you can get by subscribing to Patreon.
Patreon - 3DGROUNDThe first thing to do is change the background. He will immediately give an understanding of how it is necessary to put the light and in general will set the general mood of the picture.
The main idea that I wanted to realize was a car driving on a dried-up lake, where endless sand stretches for tens of kilometers and mountains are visible somewhere in the distance. This was to create the illusion of privacy and focus on the car. Best of all, it's pretty easy to implement ????.
By typing "Sand Pit HDRI" on Google, I found a suitable free HDRI on DeviantArt using the first link.

Since PlayCanvas "is not friendly" with spherical maps, we need to turn this HDRI into a cubic one.
After writing a request "HDRI to cubemap online" in Google, go to the site using the first link:
https://matheowis.github.io/HDRI-to-CubeMap/As you can see from the screenshot below, the interface of the service is very simple. Press "Upload HDRI", select our "SandPit_10000x5000.hdr" and wait for the download.
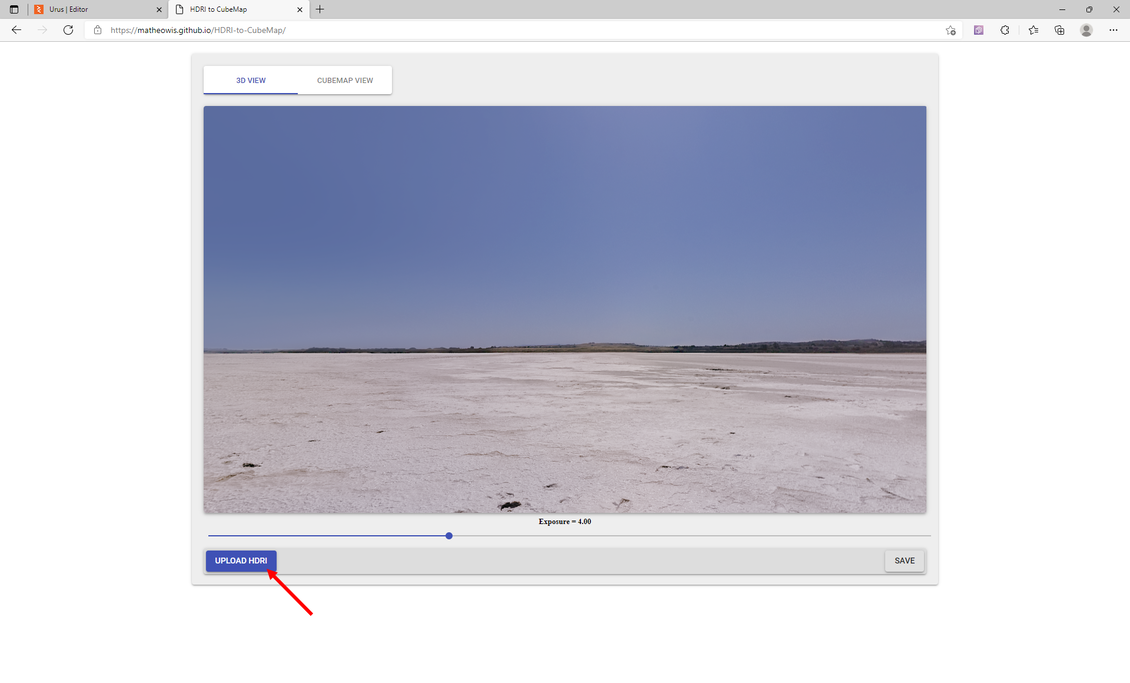
Without changing any settings, press "Save" and select the size option "4096" and "png".

And the third layout option, where each side will be a separate file. Press "Process", and after processing - "Save", in the same dialog box.
Immediately, just in case, we will save more intermediate options, with the sizes "512" and "256". Later we will use these cubemaps for reflections.
Let's make the options for "512" and "256" blurry to simulate blurry highlights. Of course, it was possible to use the "Prefilter" function to automatically generate atlases directly in PlayCanvas, with different degrees of blur, but this option did not suit me, so I just manually made 2 more blurry backgrounds.

For example, the option for "512 " I blurred to this state. The process is simple, you need to load all the pictures into Photopea, go to the "Filter" menu, then "Gaussian Blur" and set the value to "5.0px".
https://www.photopea.com/
Then save each picture. This process must be done for the variant with the size "256", only to make it even more blurry by 2-3 times.
The process is simple, so we will not dwell on it in detail.
At this stage, the preparation of the background is over and we move on to loading it into PlayCanvas.
Adding a background to PlayCanvas
Go to PlayCanvas and first of all delete everything unnecessary. Select the cube and cubemap folders in the "Assets" panel and delete them using the context menu. We do the same with the "playcanvas" object in the "Hierarchy" panel.
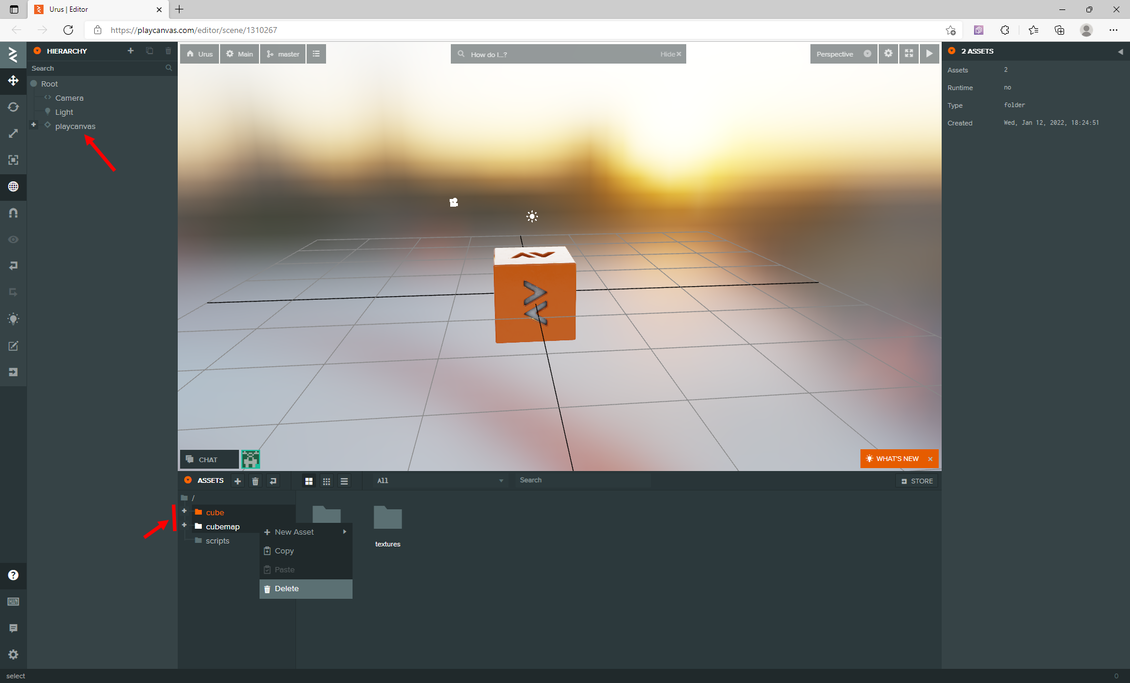
We should have a scripts folder in the "Assets" panel and two objects in the "Hierarchy" panel - a camera and a light.
Let's create a folder "env" and a subfolder "cubemap" in it, as follows:

To rename a folder, select it and enter a new name in the "Inspector" panel on the right.

Make sure we have the "cubemap" folder selected, then simply drag and drop to load the following files into the PlayCanvas. Please note that we are loading the variant with the size "4096".
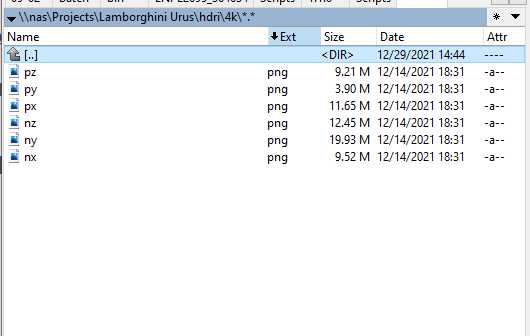
After dragging, after some time cubemap pieces will appear in the list.
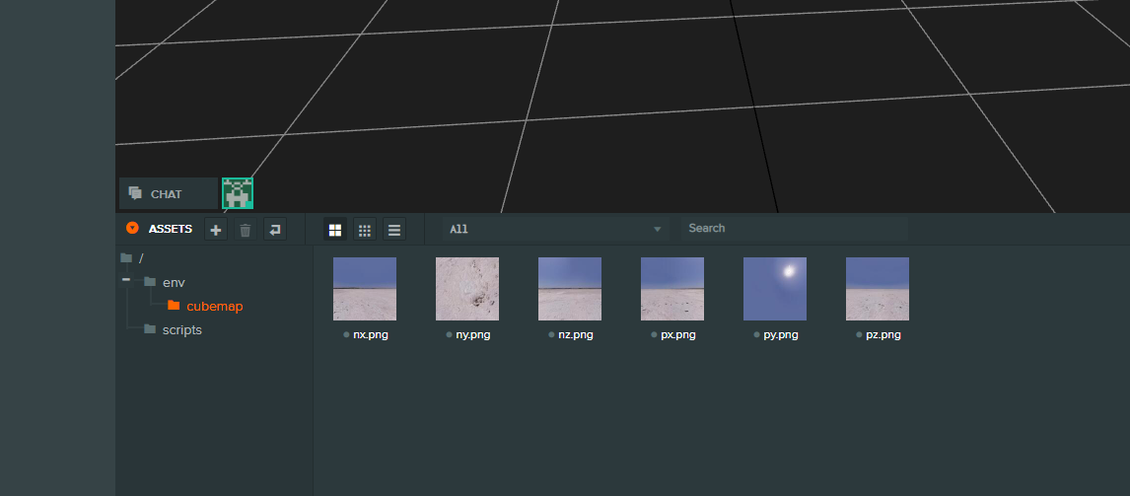
That's how easy it is to load assets into PlayCanvas. It is only necessary to keep order in the project and correctly divide it into folders for easier search and navigation in the project.
The next step, we will create the "CubeMap" shader, to do this, call the context menu in the "Assets" panel, then "New Asset" and select "CubeMap" from the list of possible assets. As you might have guessed, this is the shader that will be used as a background in the "Rendering" settings.
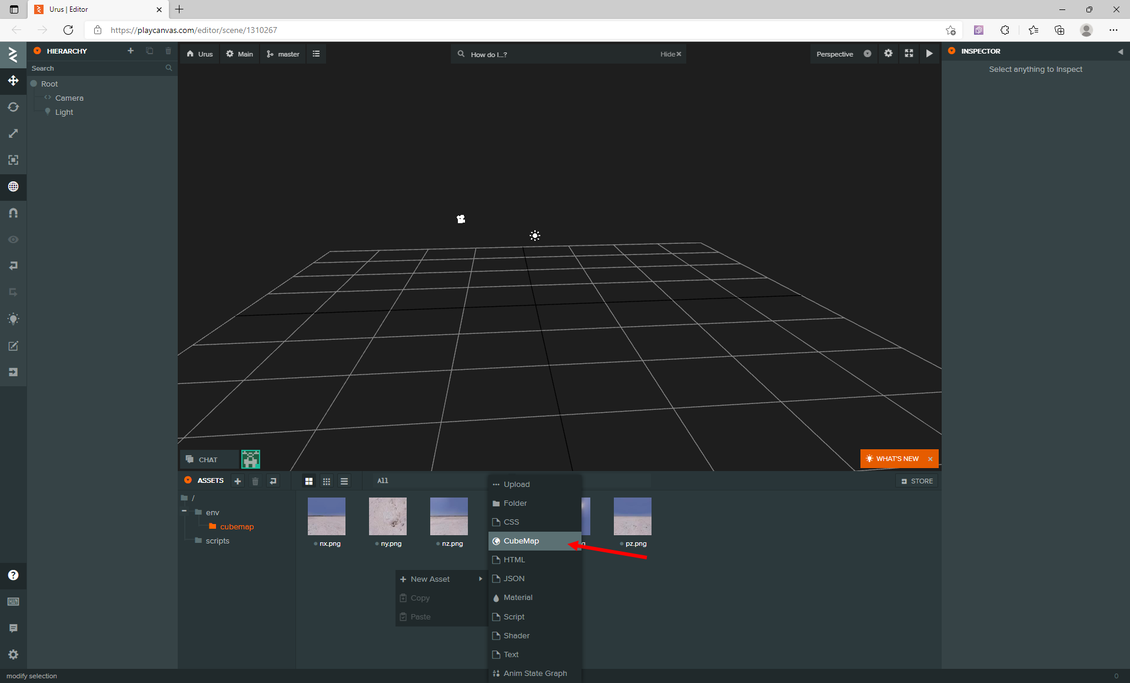
Name the shader "Sky" and drag and drop the pieces of images into the desired slots "Faces".

I drew a diagram of what names should correspond to each side of the cube.

As a result, you should have something like this.

Now, go to "Settings", the "Rendering" rollout, and with a simple drag and drop, assign the "Sky" shader as the "Skybox".
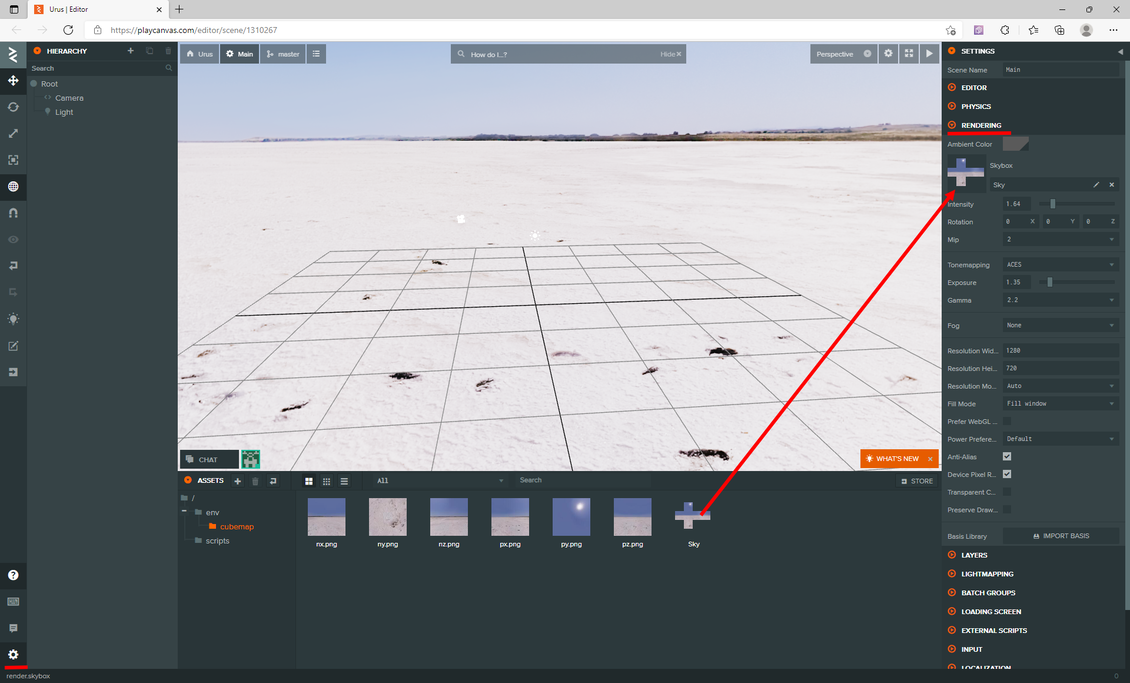
Start the project with the "Play" button. Fine! We now see the panorama of the desert, everything worked!

Preparing other CubeMap
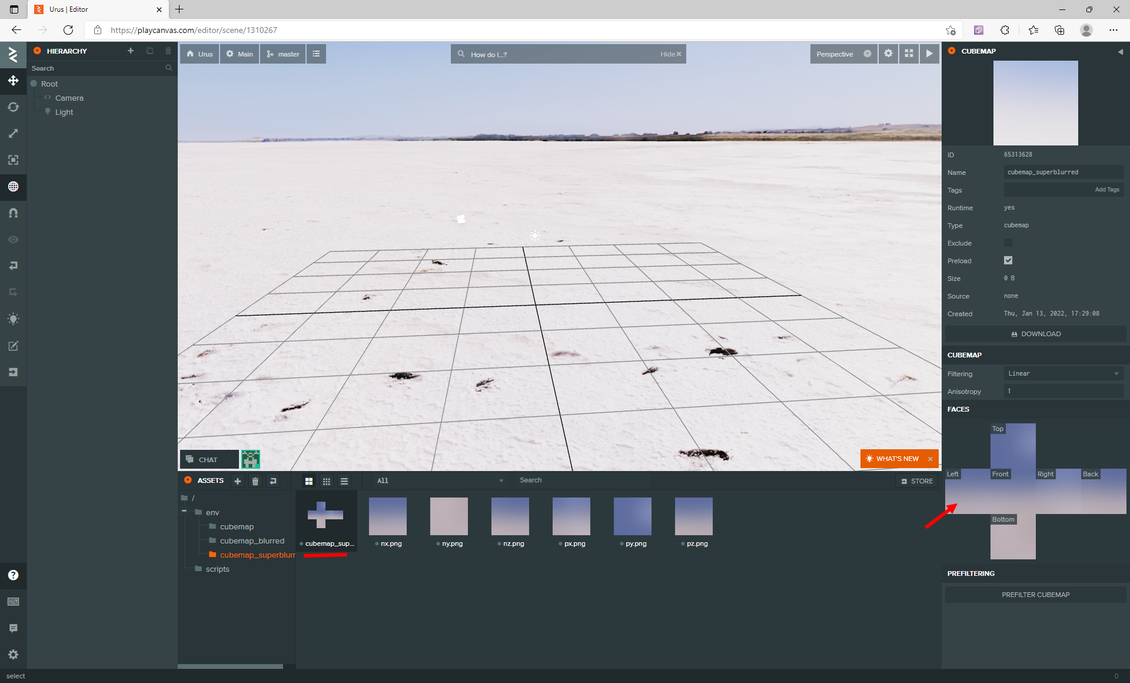
We still have other cubemaps with "512" and "256" sizes. By analogy with the previous section, let's create the "cubemap_blurred" and "cubemap_superblurred" folders.
In each folder add the appropriate cubemap textures, create shaders in each folder named "cubemap_blurred" and "cubemap_superblurred".
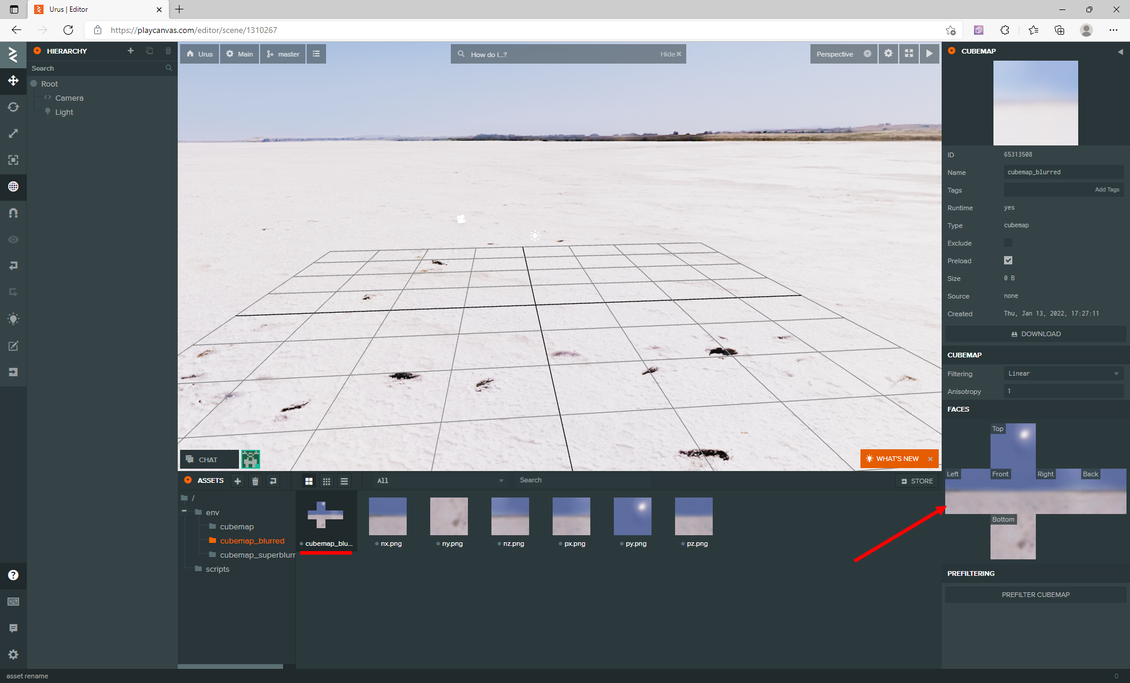
I'll duplicate the "Faces" layout again.
And for the variant with the size "256", it will be like this.
Conclusion
In the next part of the tutorial, we will finish the work on the environment, don't miss it!
FAQ
1. What is this article about?
2. What is covered in Part 2?
3. Why is project planning important for automotive WebGL applications?
4. Can PlayCanvas handle complex automotive models?
5. Why is optimization critical in automotive projects?
6. Can materials be customized in real time?
7. Does Part 2 focus on user interaction?
8. Can camera controls be customized?
9. Is PlayCanvas suitable for commercial automotive configurators?
10. Can these techniques be applied to products other than cars?
11. How important is asset organization in large projects?
12. Can projects like this run on mobile devices?
13. Are programming skills required for advanced features?
14. What advantages does WebGL offer over static renders?
15. Can the project continue to evolve after launch?
16. Who is this article useful for?
Latest articles


{{comment.text}}