 English
 Overview
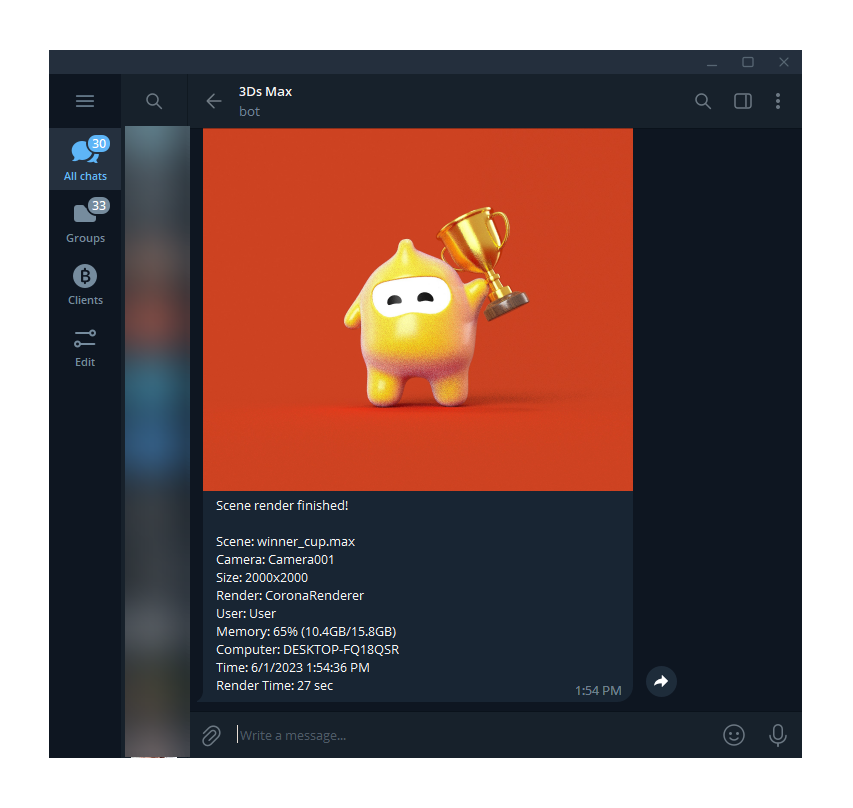
With Telegram Notifications you can receive notifications about the end of rendering directly in Telegram. Thanks to a special bot, even a render image can be attached to messages. As well as additional information, for example:
- Scene name
- Active camera name
- Render size
- Render engine
- Username
- Name computer
- Memory status
- Exact time and date
- Time spent rendering the image
- And more...
Telegram Notifications has a lot of settings, read this guide for more details.
Download Telegram NotificationsVideo demonstration of the features
Possibilities:
- Sending Telegram messages to a bot
- Attaching the latest render to a message
- Easy and clear setup for connecting a bot to Telegram
- Customizing the type of messages with your own text
- Templates Render Image, Scene Name, Local Time and others to automatically insert render image, scene name and local time...
- Set minimum render time for sending messages
- Auto start script on 3Ds Max startup (no interface)
- Instant updates
- Multi-language interface
- API
Script application:
Telegram Notifications is useful in situations where you need to move away from the computer - drink coffee, take a break from the monitor, go outside or leave the render for the night. You will always receive a notification about the end of the render and the message will come in a convenient form in Telegram. A picture of the last render will also be sent to you in a message to evaluate the intermediate version.
How to use
Before using the script for the first time, you need to set up a connection to the bot. For detailed instructions on how to connect to the bot, see below in this guide.
To enable/disable notifications, click on the "Bell" icon on the toolbar.
To open the settings, hold down the Shift key, then click on the "Bell" icon.

Installation
Telegram Notifications uses the Universal Installer to guide you through the installation and also creates buttons in the Main Toolbar. Everything is done so that you make a minimum of effort and do not waste precious time.
Step 1

Run the installer, just drag&drop the TelegramNotifications.mzp file into the Viewport of Autodesk 3Ds Max. Or run TelegramNotifications.mzp using the dropdown menu Scripting → Run Script.
Installation on the example of Prune Scene (Video)Step 2
After launching the installer, you will see the following window:

Select the interface language that suits you, click Next.
Step 3

Read the license agreement and agree to it, click Next.
Step 4

At this point, you can configure the installation options. For example, where to create a button in the interface (Main Toolbar, Quad Menu, Main DropDown Menu).
We recommend leaving all options at their defaults and clicking Next(Next).
Below is a description of what each option does if you want to change anything.
Note!
For this script, menu items in QuadMenu are forced!
Tool Bar (Recommended) - set the icon button on the main toolbar.
Main DropDown Menu - create a new dropdown menu called 3DGROUND next to the Help dropdown menu and sub-item PasteRefImage. If other scripts from this site are installed, they will be added to the 3DGROUND dropdown menu.
Quad Menu - disabled for this script. Menu items in QuadMenu will be created forcibly.
Use HiDPI icons - use vector icons (SVG) for high resolution monitors. If your 3Ds Max is older than 2018, where there is official support for higher resolution monitors, you can enable this option. Icons will work for regular monitors as well as monitors with higher pixel density.
Setup Options - you can choose to Install or Remove the script.
Step 5
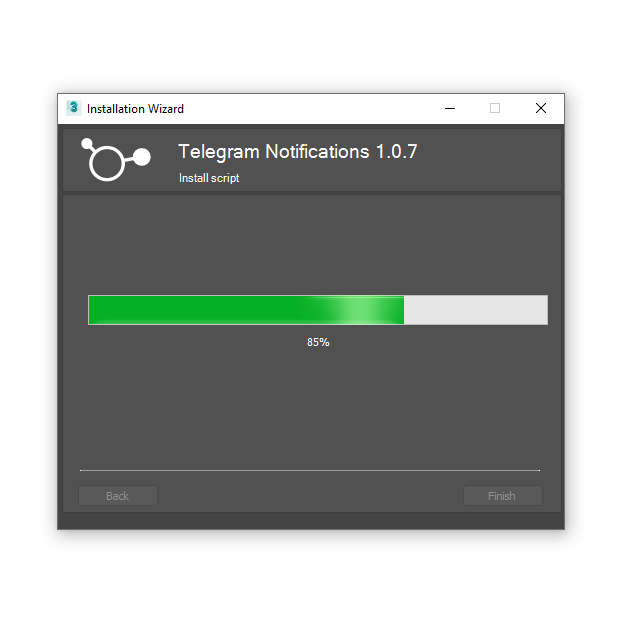
At this stage, the installer copies all files and creates menu items. You will need to click Yes if the installer does not have sufficient rights to perform the copy. See screenshot below:
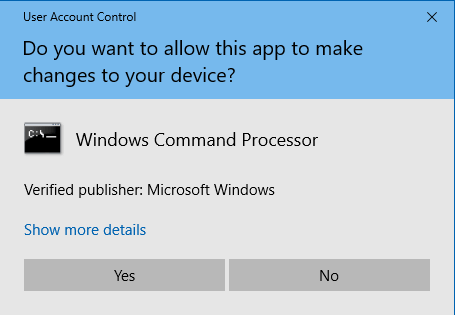
If you click No, - there are no guarantees that the script will work correctly and all files will be copied!
Step 6
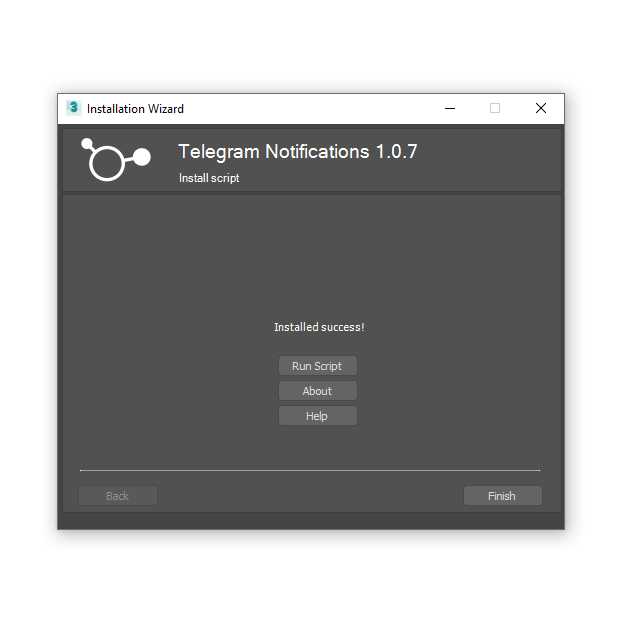
If the installation was successful, you will see the following window. Click Finish to exit the installer.
You can now run the script from the Main Toolbar or the 3DGROUND drop-down menu.

Note!
Depending on the settings selected during installation, these icons in the screenshot may not appear in the interface.
Uninstall
Run the installer and follow the instructions. See Installation - Step 1, Step 2, Step3 for details.

At the stage of choosing installation options, select Remove, see the screenshot above for details. Click Next and follow the instructions.
During the uninstall process, if the installer has insufficient rights, you will need to click Yes, in the UAC window, see the screenshot below:
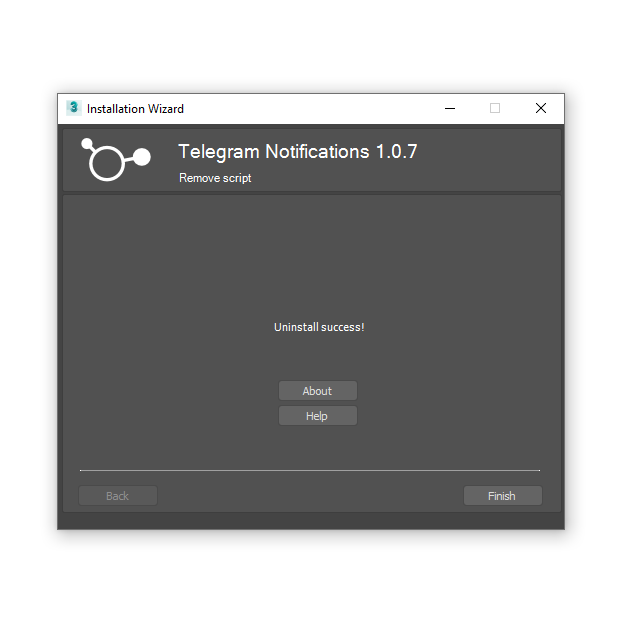
After successful removal, you will see a window:
Multilingual

In new versions of Telegram Notifications, support for different interface languages has been added.
Currently, the following languages are supported: English, Ukrainian, Turkish, Vietnamese and others.
You can choose the interface language during installation of Telegram Notifications or after it is launched.
Select the appropriate language from the Language drop-down menu and the interface will instantly be displayed in the selected language, without having to re-open the script.
The list of languages is not random. Added exactly those languages whose regions made the most purchases.
If you want to see Telegram Notifications in your native language, buy a license and support the script itself, maybe your language will be included in the next version?!
Grammar errors and typos in the translation are not ruled out, write in the comments if you find any inaccuracies.
Or, we can provide you with all the tools you need to edit the language file!
Telegram Notifications
Connecting to Telegram Bot
When you open the script for the first time, you need to set up a connection to the Telegram bot. To do this, click on the Connect to Bot button, after which a window with instructions will open.
To open the script settings, hold down the Shift key, then click on the "Bell" icon.

You will see the following window:
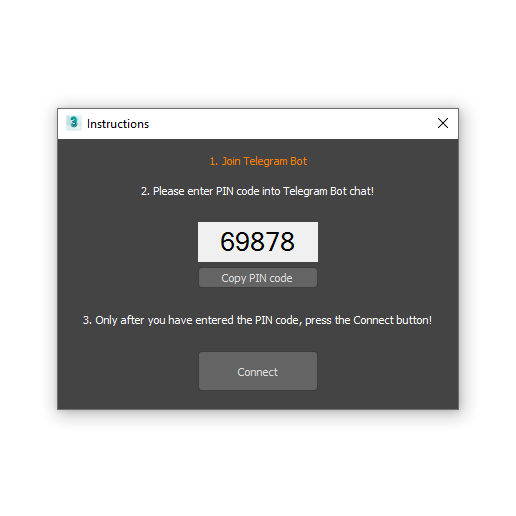
Click on the hyperlink Join Telegram Bot. After that, you will be redirected to the web page for adding a bot to Telegram.

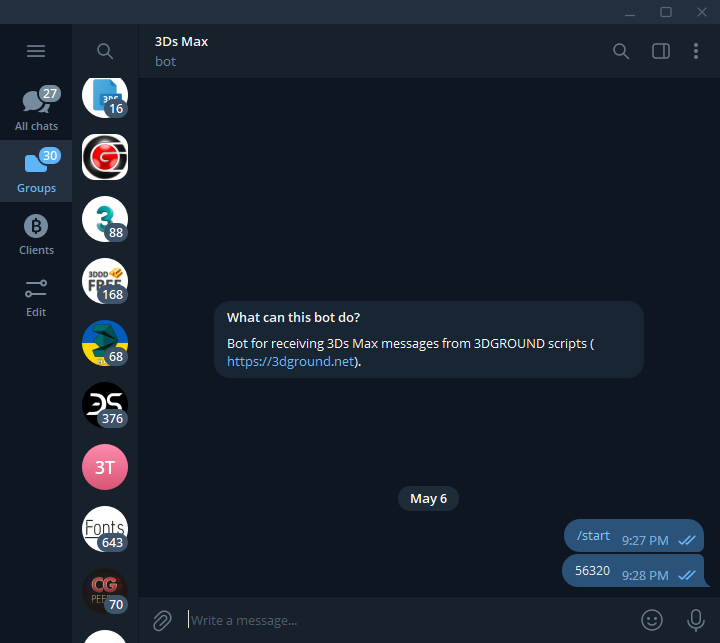
Connect the bot and type the /start command in the chat with the bot.

Copy the PIN code from the Telegram Notifications script and paste it into the chat with the Telegram Bot.
Click Connect to connect.

If you did everything right, you will see a message that the connection was successful. The bot will also give you a "Personal Bot ID".

Click the Send test message button to check if notifications are being received.
A test message can be sent without a picture!
Ready!
Enable/disable Telegram notifications
Click the "Bell" icon to enable/disable notifications in Telegram.
With notifications enabled, each time a render is completed, a message will be sent to the Telegram Bot.
Depending on how you set up messages, you will see a picture of the last render and various technical information.
Enabling/disabling notifications is possible from the script settings. To do this, click on Enable notifications (Enable Notifications).
To open the script settings, hold down the Shift key, then click on the "Bell" icon.
Setting the minimum render time
Setting Min. render time (sec) - allows you to configure sending messages after a certain time interval.
In order not to "spam" in Telegram when you make test renders for several seconds, you can adjust this parameter. The default value is 60 seconds.
You can set the value from 1 second to several hours.
Setting the message type
You can personalize the appearance of messages to your taste thanks to templates.
Click on Attach Information and select the required items from the drop-down list.
Such templates will be dynamically replaced in the Telegram message.
The following templates exist:
- Render Image - to insert an image of the last render
- Scene Name - scene name
- Local Time - exact local time of the computer
- Computer - computer name
- Computer - computer name
- User - OS username
- Camera - active camera name (example: Camera_001)
- Render Size - render size (example: 1024x640)
- Memory - memory information (example: 68% (10.9GB/15.8GB))
- Render Engine - render engine name (example: CoronaRenderer)
- Render Time - time spent on render image
Note!
The Render Image template does not insert any text information, it is used to add the last rendered image to the message.
Render Image Settings
The Use Corona Light Mix If Possible setting will use the Light Mix image instead of the normal rendered image.
API
An API has been added to Telegram Notifications to allow sending Telegram notifications from other scripts.
Below is an example of how you can conveniently connect the API.
-- Send photo with caption
api.sendPhoto "My super render" @"C:/Users/User/Desktop/LivingRoom.jpg"
-- Send default message
api.sendMessage "Hello world"
To connect API use this code: api = ::TELEGRAM_NOTIFICATIONS_API()
api.sendPhoto "Your image caption" @"Path to image" - sending a picture with a description.
api.sendMessage "Your text" - send a regular message.
Note!
To send messages using the API, the Telegram Notifications settings must have the Enable Notifications option or the active "Bell" icon on the toolbar.
Important!
Purchase the script to use the API!
Update system
The automatic update system allows you to download and install a new version of the script in silent mode.
Important!
The update is available only for those who have purchased a license key!

Click the Check For Updates button.
If new updates are available, you will see a green indicator with the new version.
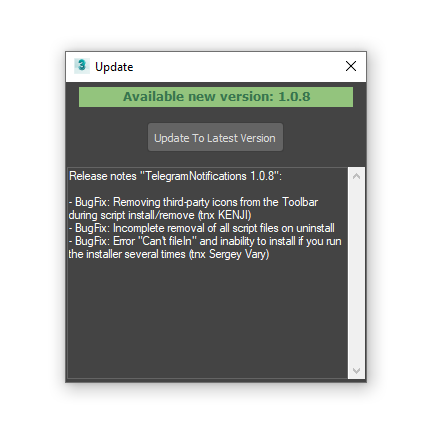
Click Update To Latest Version and wait a few seconds. After a successful update, you will see a message:

Ready! Enjoy the new version!
License
This script is distributed under a shareware license. This means that you can use Telegram Notifications absolutely free!
All basic functions will be available free of charge, except for the automatic update function by pressing one button Check For Updates, API or other items specified in the "By purchasing a license" section below.
Unfortunately, the development, development and various kinds of improvement of this software is impossible without your support, both tangible and intangible.
In addition to the main functions, the script has added: quick updates, multilingual interface, a convenient installer, a well-described manual in several languages - it's all thanks to your support!
We really appreciate your contribution to development, whether it is the purchase of a license, a repost or like on social networks, a recommendation to a colleague, a review on a video hosting or forum, tips for improvement, your feedback and more. And we are grateful to you for your indifference to this product!
At the same time, we are well aware that not everyone can make a material contribution - not having such an opportunity, for example, being a student or not receiving income from their work in 3Ds Max, and we do not require this from you. Therefore, we have made the product free to use for absolutely everyone! We are well aware of the inconvenience of subscriptions or dependence of a license on a version, or other ways to stimulate sales and repeat purchases - therefore, we abandoned this in favor of convenience and made lifetime licenses.
We hope for your understanding and desire to really help the development of our resource. The complexity of development increases with each new release, and lifetime low-cost license keys do not bring super-profits. If you want the project to develop and improve - get a license key.
By purchasing a license, you not only contribute to the future of this software, but also encourage other useful products.
After all, we are working for you.
For a more detailed description of what features the license provides, read below...
Purchase LicenseBy purchasing a license
- You will disable the modal window when you run the script, where you need to press 1, 2 or 3 to close it
- You will have lifetime updates available
- You will have the option to update on click of one Check For Updates buttons
- API will be available to you
- About the release of each major release, you will be notified by email
- You will support the author and continue development this script
- You will receive full support
- You will be able to participate in the development of the script
License agreement
- This software is available to everyone for free use
- You can use almost all the features of this software for free
- You can use 1 (one) license key for a maximum of 2 (two) computer (Home and Work)
- The author does not bear any responsibility for possible loss of data on your computer or other losses associated with this software
- You may not transfer to third parties or rent to sublease the license key
- You may not profit from the use or provision of the license key for any direct commercial, monetary or other benefit
License message
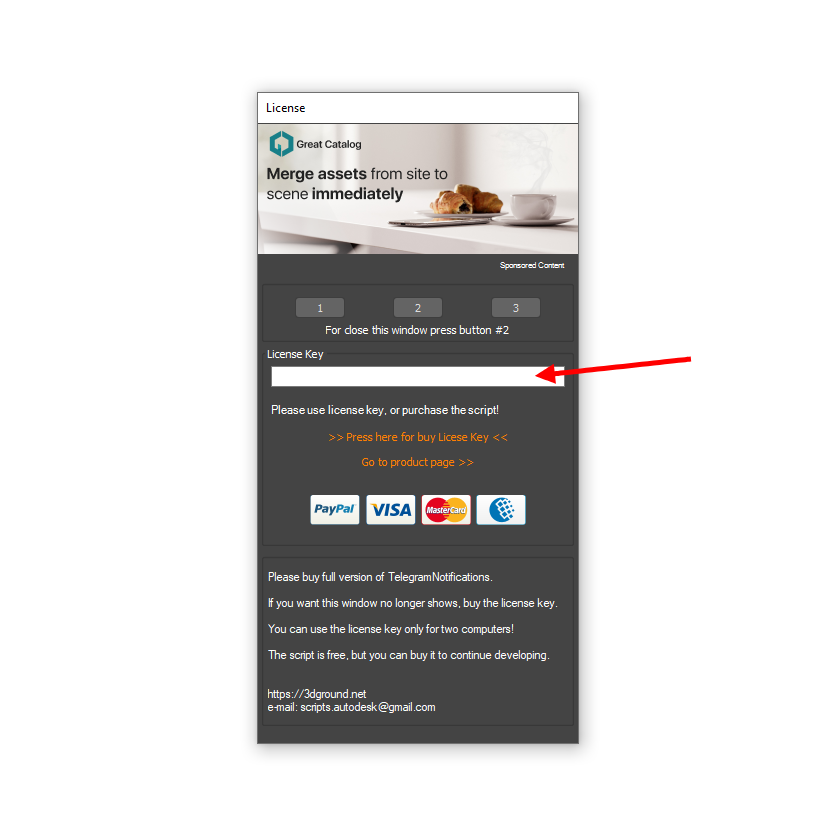
Every time you launch Telegram Notifications, you will see a message asking you to purchase a license.

To close this window, press 1, 2 or 3.
Look at the inscription "To close this window, press #... " ("For close this window press button #...").
By closing this window, you can continue to use all functions for free (except those mentioned above in the "By purchasing a license") section.
Purchase a license key to stop this window from showing up!
Purchasing and using a license key
To purchase a license key, go to the product page:
Page Telegram Notifications
Or click on the link >>Purchase a license key<< (>> Press here for buy License Key <<), in the script's license window.
You will be redirected to the payment page.
You can use the license key on a maximum of 2 computers (Home and Work).
Your license will work permanently, and you will receive lifetime updates!
Choose a convenient payment method. Fill in the correct First Name, Last Name and your email address.
Important!
Specify the correct data when making a purchase! A message with a license key will be sent to your email address!
After payment, find your license key on the email you specified. Find it and copy it to your clipboard.
Paste the key you copied into the license notification window.

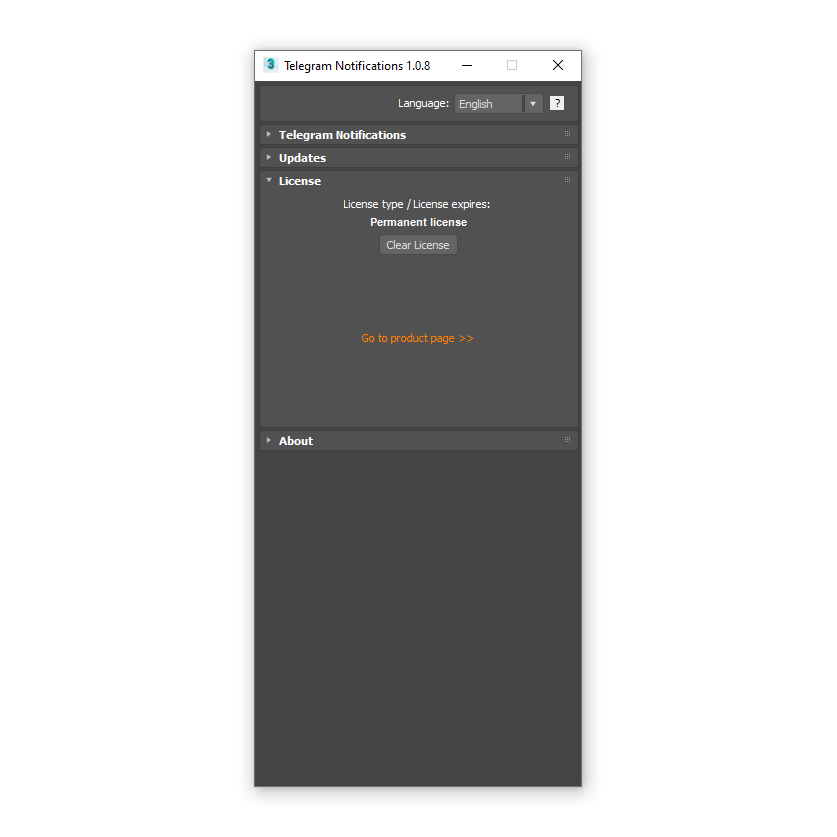
If you did everything right, when you start the script you will no longer see a message about the license.
Ah, in the License rollout, there will be a message about a lifetime license.


{{comment.text}}