Overview
Stock Model Fixer is a powerful tool for optimizing and preparing models before adding to the main project scene. You can also fix and optimize the models in the current scene.
This script is indispensable when using models with 3ddd/3dsky, cgtrader, hotpies and other resources.
Features
- Remove animation keys
- Disable BackfaceCull property
- Enable Renderable property
- Resolve and Relink textures
- Remove empty objects
- Remove layers
- Clean MultiMaterial
- Unhide all objects/polys
- Instant copy/paste selected model between 3Ds Max windows (different versions)
- Work with TurboSmooth (Add, Remove, Select, Iters. to 0)
- Fit model to dimensions
- Geometry fix (Reset XForm, Detach Trick, Box Trick, Snapshot)
- Group/Ungroup
- Fast set pivot
- Move model to center scene
- Attach selected objects
- Fix normals
- Rename: textures, materials, objects, groups
- Check for errors (xView, AssetTracking, Clay Mode)
- Copy textures in to project folder
- Instant Updates
- Hints and tooltips
- Multilanguage interface
A quick overview of all script features in this video:
Video with Stock Model Fixer FeaturesHow to use
Unzip the model you downloaded anywhere on your hard drive.
Make sure you extract all files and textures.
It is recommended to open two 3Ds Max windows for convenience. One is for your current project scene, the other is for preparing the model.
- Create a new scene and open the model. Then click the Apply button on the File tab in the Stock Model Fixer script. All checked options from "Apply to current scene" will be applied to the current scene.
- In the Tools tab, if necessary, do Box Trick, Detach Trick, Snapshot, Reset XForm to fix broken model geometry.
- In the Textures tab, specify the path for saving textures (Copy textures to folder) (for example, a folder with textures of your project) and press Copy Textures. All textures of the model will be copied to the specified location.
- Copy and paste the model using CopyTo/PasteFrom.
- Done.
Watch this video with an example of using this script:
Example of usage Stock Model FixerStock Model Fixer has many tools for optimizing and preparing models. Read more about each tab below.
Installation
Newer versions of the Stock Model Fixer use the Universal Installer to help you with the installation, as well as create buttons in the Main Toolbar and Quad Menu. Everything is done so that you make a minimum of effort and do not waste valuable time.
Step 1
Run the installer, just Drag&Drop the StockModelFixer.mzp file into the Autodesk 3Ds Max Viewport.
Or run StockModelFixer.mzp using the Scripting → Run Script drop-down menu.
The entire installation process is in this video instruction. Another script (Prune Scene) is used as an example, but the process is absolutely identical for the Stock Model Fixer!
Installation using Prune Scene as an example (Video)Step 2
After starting the installer, you will see the following window:
Select the interface language, click Next.
Step 3
Read and agree to the license agreement, click Next.
Step 4
At this step, you can customize the installation options. For example, where to create a button in the interface (Main Toolbar, Quad Menu, Main DropDown Menu) .
We recommend leaving all the default options and click Next.
Below is a description of what each option does if you want to change anything.
Tool Bar (Recommended) - creates a button with an icon on the main toolbar.
Main DropDown Menu - creates a new dropdown menu named 3DGROUND next to the Help dropdown menu with subitem Stock Model Fixer. If other scripts from this site are installed, they will be added to the 3DGROUND dropdown menu.
Quad Menu - creates a new Stock Model Fixer menu item in QuadMenu.
Use HiDPI icons - use (SVG) vector icons for high resolution monitors. If your 3Ds Max is greater than 2018, which has official support for higher resolution monitors, you can enable this option. Icons will work for regular monitors as well as monitors with higher pixel density.
Setup Options - you can select Install or Remove script.
Step 5
At this step, the installer copies all files and creates menu items. You will need to click Yes if the installer does not have enough rights to copy. See screenshot below:
If you click No, there is no guarantee that the script will work correctly and all files will be copied!
Step 6
If the installation was successful, you will see the following window. Click Finish to exit the installer.
You can now run the script from the Main Toolbar or the 3DGROUND dropdown menu.
Note!
Depending on the settings selected during installation, these icons in the screenshot may not appear in the interface.
Uninstall
Run the installer and follow the instructions. For details, see Installation - Step 1, Step 2, Step3.
At this step of choosing installation options, select Remove, see the screenshot above for details. Click Next and follow the instructions.
During the uninstallation process, if the installer does not have enough rights, you will need to click Yes in the UAC window, see the screenshot below:
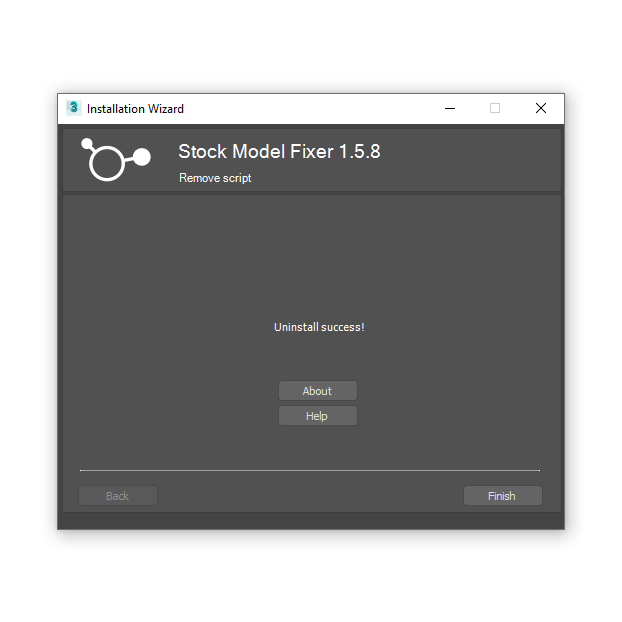
After successful removal, you will see a window:
Multilanguage
In new versions of Stock Model Fixer, support for different interface languages has been added.
Currently the following languages are supported: English, Russian, Ukrainian, Polish, Vietnamese, Turkish.
You can select the interface language during the installation of Stock Model Fixer or after launching it.
Select your language interface from the Language dropdown menu and the interface will instantly be displayed in the selected language, without having to reopen the script.
The list of languages was not compiled at random. The languages that have made the most purchases have been added.
If you want to see Stock Model Fixer in your native language, buy a license and support the script itself, maybe your language will be included in the next version?!
Grammatical errors and mistakes in translation are not excluded, write in the comments if you find any inaccuracies.
Or, we can provide all the tools you need to edit the language file!
File Tab
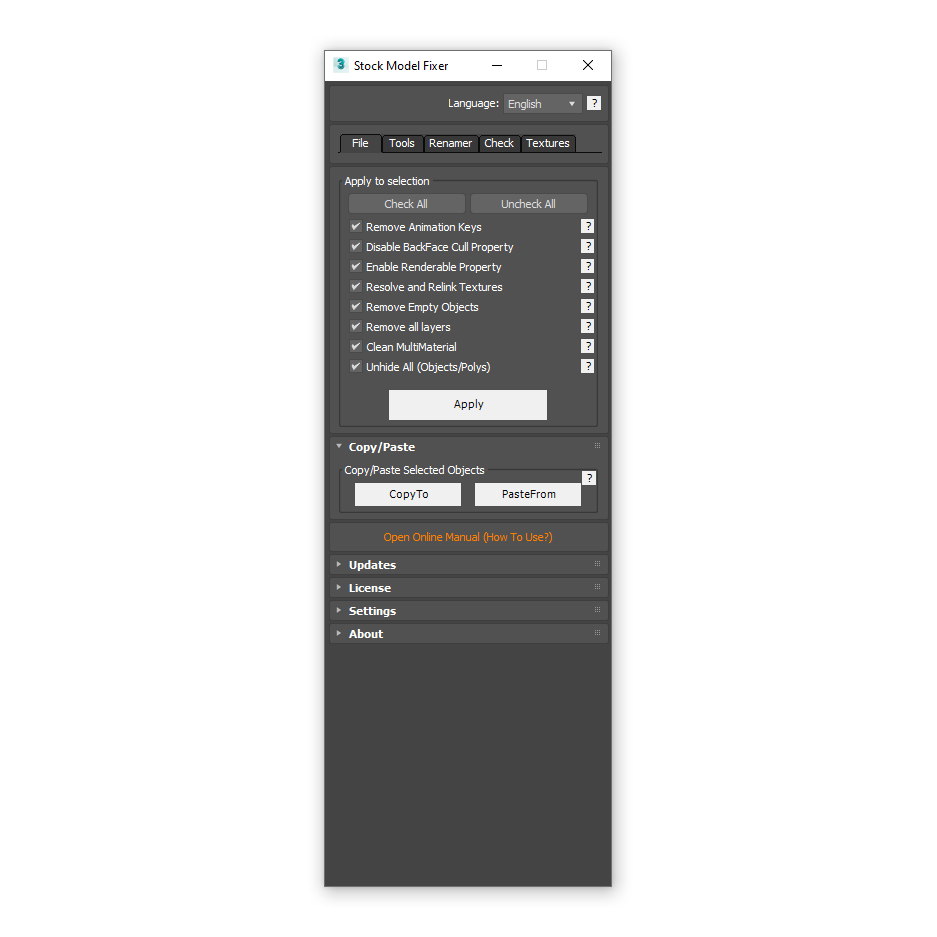
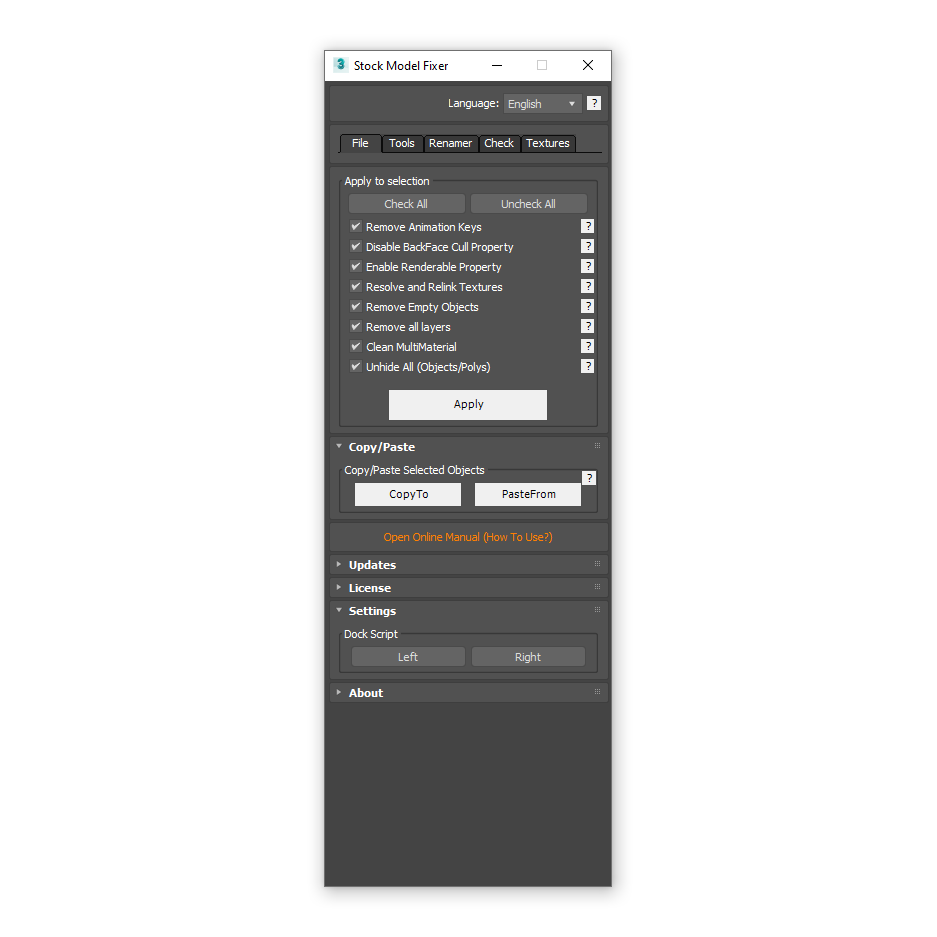
Open the model in a new scene, press the Apply, button so that all the checked options in "Apply to current scene" have been applied.
Remove Animation Keys - removes all animation keys. Usually animation is not needed and this option is enabled by default.
Disable BackFace Cull Property - disables the BackFace Cull property for all objects in the scene. This makes the Viewport faster.
Enable Renderable Property - Enables Renderable in properties for all objects in the scene. Quite often, you come across such models on 3D stocks in which this property is disabled and you can see this only on the render.
Resolve and Relink Textures - helps to find textures in folders and subfolders of the model and automatically assign new paths.
Remove Empty Objects - removes objects with 0 polygons, empty groups and Particle View objects.
Remove All Layers - removes all layers in the scene and transfers all objects to 0 layer (0 default). If you disable this option, unwanted and empty layers can get in your main project scene and ruin your hierarchy.
Clean Multimaterial - removes unused sub-materials.
Unhide All (Objects/Polys) - makes all objects and object polygons visible.
CopyTo/PasteFrom Section
CopyTo - copies the selected objects.
PasteFrom - pastes the copied objects.
Important!
Whichever tab you open, the CopyTo/PasteFrom section will always be available.
CopyTo/PasteFrom - works between scenes, between different 3Ds Max windows and even after restarting the computer.
Tools Tab
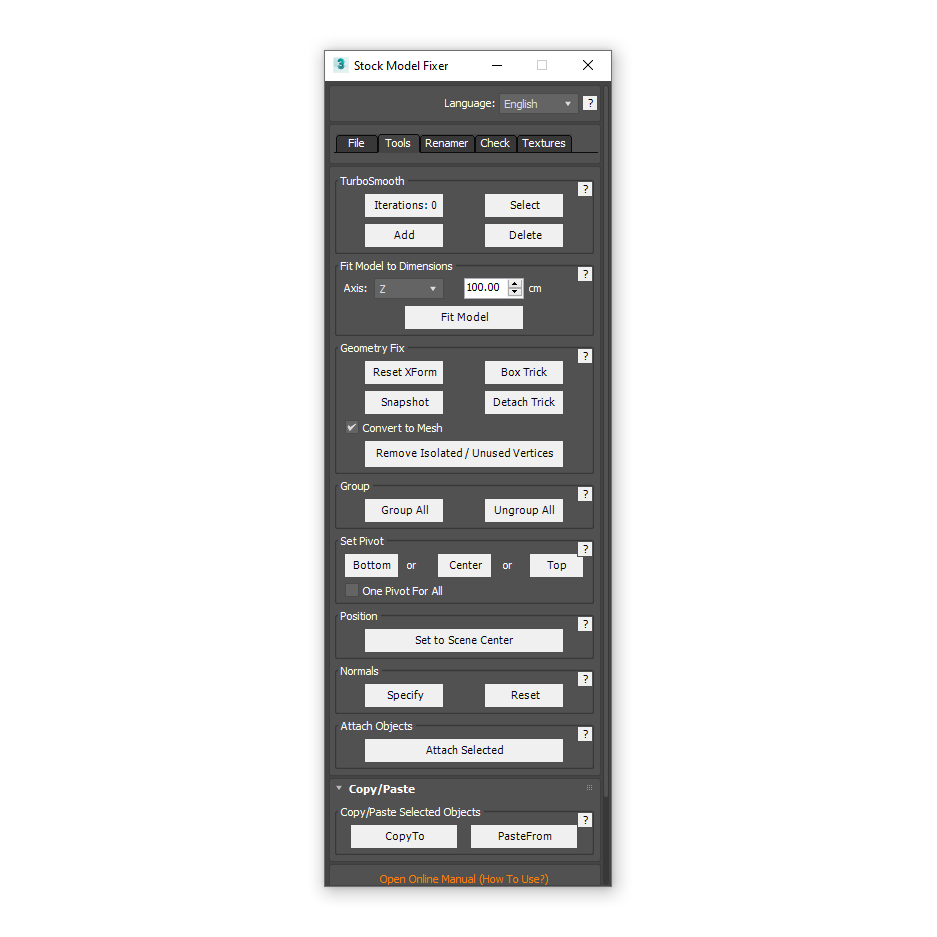
Turbo Smooth
Allows you to manipulate TurboSmooth and MeshSmooth modifiers applied to objects.
Iterations: 0 - sets smooth iterations to 0, and activates Render Iters.
Thus, smooth will be visible only on the render and there will be less load the Viewport.
Select - select all objects in the scene with the TurboSmoot and MeshSmooth modifier.
Add - adds a TurboSmooth modifier to the selected object.
Delete - removes the TurboSmooth and MeshSmooths modifier for the selected objects.
Tip!
It is convenient to select all objects with the TurboSmooth or MeshSmooth modifier, then remove these modifiers for them. Through Add - add a new TurboSmooth modifier, so you can control the number of iterations on objects and get rid of the problem of "Isolated vertices" and incorrect Smooth Groups, after collapsing modifier stack.
Fit Model to Dimensions
Sets the size of the model along the specified axis.
Axis - the axis relative to which the size of the model will be set.
Fit Model - proportionally changes the scale of the model along the selected axis with the specified size in centimeters.
Set Pivot
Allows you to quickly set the Pivot Point.
Bottom - sets the Pivot Point to the center at the bottom of the model. Suitable for most models that need to stand on a surface (ground).
Center- sets the Pivot Point to the center of the selected objects .
Top - sets the Pivot Point to the center of the top of the model. Suitable for hanging objects such as lamps.
Position
Moves the selected objects to the center of the scene.
Set to Scene Center - move the selected objects to the center of the scene.
Normals
Corrects the normals of the selected objects. A very useful feature for those who import objects from CAD programs, Sketchup, AutoCad, etc.
Specify - assigns Specify type to normals.
Reset - resets the normals to their initial state.
Attach Objects
Attaches the selected models into one object.
Attach Selected - Attaches selected objects into one mesh. Thanks to special algorithms, this feature works faster than standard Attach tools in 3Ds Max.
Very often, models from stocks have many small objects combined into a group, or even worse, groups in groups, which has a very negative effect on the performance of the Viewport. By combining the selected models (Attach Selected) into logical pieces, for example a model with a sofa can be combined together, decor separately, lamps with cords and a stand are also separately, so you reduce the number of objects and unload virtual memory.
Note!
Convert objects to Mesh, this saves up to 30% virtual memory!
Renamer Tab
Helps to rename for the selected: textures, materials, objects, groups, layers.
To start renaming, enter Model Name. Do not be lazy to write the correct names.
Check the items that need to be renamed and click the Rename button.
If the option Move Model to Layer is enabled, the model will be moved to a separate layer. This is good if, for example, you need to create 100 chairs in the project scene, it will be much more convenient to work with a separate layer.
Tip!
Renamer is useful when Cyrillic characters are used in names or incorrect names are used.
Check Tab
Visual Style
Toggle Clay Mode - switches the Viewport display mode between Clay/Shaded. In Clay mode, you will have a better view of the Flipped polygon normals.
xView
This is a collection of commonly used xView tools.
Isolated Vertices - toggles the display mode of isolated vertices.
Overlapping Faces - toggles the display mode for polygons that are coplanar (overlap each other).
Open Edges - toggles the display mode for open edges.
Asset Tracking
Open Asset Tracking - opens the Asset Tracking dialog, with which you can view if correctly located textures.
Textures Tab
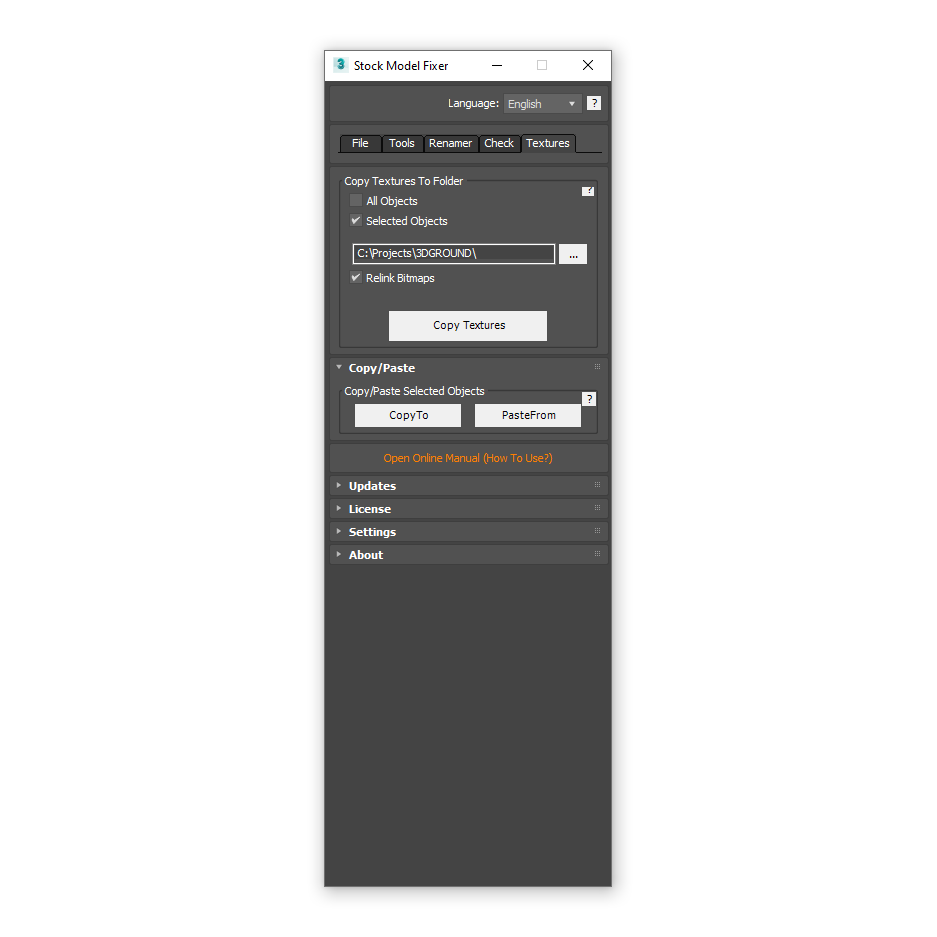
This section helps you copy textures for selected objects or the entire scene to the textures folder of your project.
By default, the Relink Bitmaps option is enabled - automatically assign new paths for copied textures in materials.
To copy textures, press the [...] button to select the texture path to your project, then press Copy Textures.
Settings
Dock Script - allows you to dock the script to the left or right side of the Viewports. If the script is pinned, the button will be highlighted in green.
To unpin a window, click on the active button so that it turns gray.
Update system
The automatic update system allows you to download and install a new version of the script in quiet mode.
Important!
The update is available only for those who have purchased a license key!
Click the Check For Updates button.
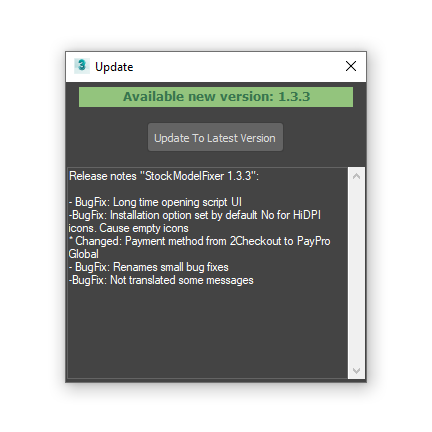
If new updates are available, you will see a green indicator with the new version.
Click Update To Latest Version and wait a few seconds. After a successful update, you will see a message:
Restart Stock Model Fixer and enjoy the new version 😊.
License
This script is distributed under a shareware license. This means that you can use Stock Model Fixer absolutely free!
All basic functions will be available for free, except for the automatic update function by click of a button Check for Updates or other items specified in the "Obtain license" section. below.
Unfortunately, the development and various kinds of improvement of this software is impossible without your support, both tangible and intangible.
In addition to the basic functions, the script added: quick updates, multilanguage interface, convenient installer, well-described manual in several languages - all thanks to your support!
We really appreciate your contribution to development, be it purchasing a license, reposting or liking on social networks, recommending to a colleague, reviewing on a video hosting or forum, suggestion for improvement, your feedback, and more. And we are grateful to you for your indifference to this product!
At the same time, we are well aware that not everyone can make a tangible contribution - without such an opportunity, for example, being a student or not receiving income from your work in 3Ds Max, and we do not require this from you. Therefore, we made the product free to use for absolutely everyone! We perfectly understand the inconvenience of subscriptions or the dependence of the license on the version, or other ways to stimulate sales and repeat purchases - so we abandoned this in favor of convenience and made lifetime licenses.
We hope for your understanding and desire to really help the development of our resource. The complexity of development increases with each new release, and lifetime low-cost license keys do not bring super-profits. If you want the project to develop and improve - purchase a license key.
By purchasing a license, you are not only contributing to the future of this software, but also encouraging other useful products.
After all, we are trying for you 😊!
For a more detailed description of what features the license provides, read below ...
Purchase LicenseObtain License
- You will disable the modal window when you run the script, where you need to press 1, 2 or 3 to close it
- You will have lifetime updates
- You will have the option to update by one click Check For Updates
- Every major release will be notified by email
- You will support the author and continue developing this script
- You will receive full support
- You will be able to participate in the development of the script
License Agreement
- This software is free for everyone to use
- You can use almost all the functions of this software for free
- You can use 1 (one) license key for a maximum of 2 (two) computers (Home and Work)
- The author does not bear any responsibility for the possible loss of data on your computer or other damages associated with this software
- You may not transfer to third parties persons or sub-lease the license key
- You are not entitled to profit from the use or provision of the license key, either for direct commercial, monetary or other benefit
License Message
Every time when you launch Stock Model Fixer, you will see a message asking you to buy a license.
To close this window, press 1, 2 or 3.
Look at the message "For close this window press button #...".
By closing this window, you can continue to use all functions for free (except for those indicated above in the "Obtain license" section).
Purchase and using a license key
To purchase a license key, go to the product page:
Stock Model Fixer PageOr click on the link >> Press here for buy License Key <<, in the script license window.
You will be redirected to the payment page.
You can use the license key on a maximum of 2 computers (Home & Work).
Your license will work permanently and you will receive lifetime updates!
Choose a convenient payment method. Please fill in your Name, Surname and your email correctly.
Important!
Please provide correct information when making a purchase! A message with a license key will be sent to your email address!
After payment, find your license key on the email you specified. Find it and copy it to clipboard.
Paste the key you copied into the license notification window.
If you did everything correctly, when you start the script, you will no longer see the license message.
And, in the License rollout, there will be a message about the lifetime license.

 English










{{comment.text}}