 English
 Overview
With Prune Scene, you can clean the 3Ds Max scene from scripted viruses and accumulated garbage.
This allows in some cases to significantly reduce the size and speed up the saving of the scene.
High standards in scripting, allow you to get a more comfortable experience of usage.
We tried to make a really convenient product, including automatic updates, multilanguage interface and a simple installer.
Thanks to you - the users who support us, the script will get better, the algorithms for cleaning garbage, searching for scripted viruses and its other features.
We are trying, for you 😉!
A quick overview of all script features in this video:
Video with Prune Scene featuresFeatures
- Cleaning Track Notes
- Cleaning Retimers
- Cleaning Mixers
- Cleaning Garbage Collection
- Cleaning Memory
- Cleaning Reactor Collision
- Cleaning Animated Layers
- Cleaning Missing Bitmaps
- Cleaning Missing Plugins (mrmaterialattribs.gup, berconnoise, complexior etc.)
- Cleaning Corona Renderer Missing Assets (HDCache.hdc, LUT (*.cube))
- Deleting Root Custom Attributes (day1RefCA, D1_FileNotes, NoteCount)
- Deleting Empty Layers
- Deleting all Animation Keys
- Removing Missing Objects (LinkComposite, etc.)
- Removing Invalid Objects
- Removing Particles
- Virus removal (ALC, CRP, ADSL, DesireFX, AlienBrains (mscprop.dll), PhysX Plugin Mfx, etc.)
- Fast selective virus scanning
- Instant updates
- Multi-language interface
- Batch disinfection of files from viruses
- Active protection against viruses (also protects the script startup folder)
- Recovery Tools (available only under license)
- Batch Prune - mass cleaning of scenes from garbage and viruses (available only under license)
You can use the license key on a maximum of 2 computers (Home & Work) .
Your license will work permanently and you will receive lifetime updates!
Installation
Newer versions of Prune Scene use the Universal Installer to guide you through the installation, and create buttons in the Main Toolbar and Quad Menu. Everything is done so that you make a minimum of effort and do not waste precious time.
Step 1

Run the installer, just Drag&Drop the PruneScene.mzp file into the Autodesk 3Ds Max Viewport.
Or run PruneScene.mzp using the Scripting → Run Script.
The entire installation process is in this video instruction:
Step 2
After starting the installer, you will see the next window:

Select the interface language, click Next.
Step 3

Apply license agreement and click Next.
Step 4

At this step, you can customize the installation options. For example, where to create a button in the interface (Main Toolbar, Quad Menu, Main DropDown Menu).
We recommend leaving all the default options and click Next. Below is a description of what each option does mean if you want to change anything.
Tool Bar (Recommended) - creates a button with an icon on the Main Toolbar.
Main DropDown Menu - creates a new dropdown menu named 3DGROUND next to the Help dropdown menu with subitem Prune Scene. If other scripts from this site are installed, they will be added to the 3DGROUND dropdown menu.
Quad Menu - creates a new Prune Scene menu item in the QuadMenu.
Use HiDPI icons - use vector icons (SVG) for high resolution monitors. If your 3Ds Max is greater than 2018, which has official support for higher resolution monitors, you can enable this option. Icons will work for regular monitors as well as monitors with higher pixel density.
Setup Options - you can choose to Install or Remove the script.
Step 5

At this stage, the installer copies all files and creates menu items. You have to click Yes, otherwise files are not copied. See screenshot below:
If you click No, there is no guarantee that the script will work correctly and all files will be copied!
Step 6

If the installation was successful, you will see the following window. Click Finish to exit the installer.
You can now run the script from the Main Toolbar or the 3DGROUND dropdown menu.

Note!
Depending on the settings selected during installation, these icons in the screenshot may not appear in the interface.
Uninstall
Run the installer and follow the instructions. For details, see Installation - Step 1, Step 2, Step3.

At the stage, select Remove, see the screenshot above for details. Click Next and follow the instructions.
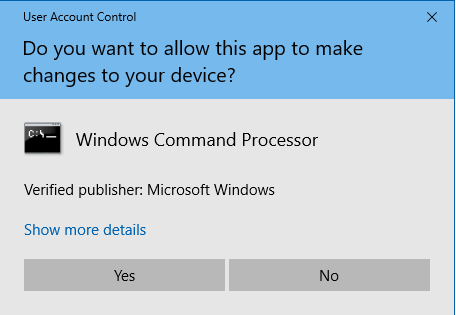
During the uninstallation process, if the installer does not have enough rights, you will need to click Yes in the UAC window, see the screenshot below:
After successful removal, you will see a window:

Multilanguage

Starting with Prune Scene 3.0.0, support for different interface languages has been added.
The following languages are currently supported: English, Russian, Ukrainian, Polish, Vietnamese, Chinese, Turkish.
You can select the interface language during Prune Scene installation or after it starts.
Select the your language in the dropdown menu Language and the interface will instantly be displayed in the selected language, without the need to reopen the script.
The list of languages is not added randomly. The languages that have made the most purchases have been added.
If you want to see Prune Scene in your native language, buy a license and support the script itself, maybe your language will be included in the next version?!
Grammatical errors and typos in translation are not excluded, write in the comments if you find any inaccuracies.
Or, we can provide you with all the tools you need to edit the language file!
Garbage cleaning

Run the script from the Main Toolbar or Quad Menu toolbar or 3DGROUND dropdown menu (depending on the settings when installing the script).
Select the necessary items to clean up your scene. And click Start.
Note!
By default, all cleanup options are disabled. You have to choose what you need, and not mindlessly use everything.
You need to understand what each option does mean, otherwise you may damage your scene!
All the settings you choose will be saved after closing the script or 3Ds Max.
After clicking the Start button, you will see colored indicators that show the statistics of cleaning.
CLEARED - garbage found and removed for the current type of cleaning.
NOT FOUND - garbage was not found for the current type cleaning.
DISABLED - option disabled.
Read more about each type of cleaning below ...
Track Note/Retimers
Note Tracks/Retimers/Mixers - can get into the scene when Merge, Import, X-Ref into the scene, or created automatically and significantly increase the size of the scene and slowdown performance.
This option removes them.
Garbage
When memory run low garbage is automatically cleaned up (Garbage Collector), but until that time, garbage will accumulate in the scene and increase its size.
This option helps to clean up such garbage immediately!
Memory
Clears the Undo Buffer - the buffer of recent actions.
Also clears the Bitmap cache - the textures that are displayed in the Viewport and slowdown the last one.
Warning!
After using this option, your scene may not display textures in the Viewport!
To turn on, use the dropdown menu Views → Show Materials in Viewport As → Shaded Materials with Maps
Reactor Collision
This option is only relevant for older versions of 3Ds Max.
Anim layers
Removes animation layers that increase the size of the scene. These layers can be created automatically, even in a static scene without animation.
Missing Objects
Removes objects from external plugins that are not connected and objects that are incorrectly imported into the scene.
This option also removes empty objects.
Missing Bitmaps
Removes paths for non-existent textures. This option helps to fix the Missing External Files error when opening a scene.
Warning!
Be careful, if you transferred or created a new scene and did not have time to assign textures paths via Utilites → Bitmap / Phonometric Paths, you can reset all texture paths!
Empty layers
Deletes layers that do not contain objects.
Sometimes, when importing drawings from Auto CAD or Merge models from 3ddd.ru/3dsky.org (and other stocks), unwanted empty layers may be created.
This option removes them.
Anim Keys
Removes all animation keys.
Warning!
If you have the desired animation in the scene, disable this option! Otherwise, all animation will be removed!
Particle View (Invalid Objects)
Removes empty objects named as Particle_View_001 ...
If, in your scene there is no Particle animation, you can safely use this option.
Corona Assets
Deletes nonexistent assets in AssetsTracker (Shift + T) that are included in the scene with models created in older versions of Corona Renderer.
Deletes paths for the next assets: HDCache.hdc, LUT files (* .cube)
Root CA
Removes junk Custom Attributes at the root of the scene that slow down 3Ds Max.
This option completely clears the attributes: day1RefCA, D1_FileNotes, NoteCount.
Missing Plugins
Cleans up remnants of unconnected plugins in the scene. Helps to avoid Missing Dlls errors at scene start.
Removes garbage from plugins: mrmaterialattribs, berconnoise, complexior, complexfresnel, thinfilm, sigernoise, sigerscratches, etc.
WARNING:
👉 Removing plugins from the scene may affect the final result on the display of materials, textures, objects in the scene and rendering.
Junk Effects
Removes duplicate trash effects from "Environment and Effects", such as "Fire Effects", "Brightness and Contrast", "Volume Light", etc.
These effects can accumulate and spontaneously duplicate, which can affect not only the loading speed of the scene and its size, but also the rendering time.
Clearing will occur if more than 5 effects are found.
WARNING:
👉 If you are using these effects for rendering, disable this option!
Active Protection

Active protection prevents scripted viruses from get to the scene, and also removes infection and its effects.
Protection is triggered every time when the virus tries to penetrate from another scene through Merge, Import, X-Ref.
Over the past few years, the number of scripted viruses has increased. At first, only two viruses were known, ALC and CRP. Now this number is much higher, and some viruses present a serious threat to privacy.
Learn more about all types of viruses and their consequences in this article:
We try to respond quickly to user messages and check every scene sent. Thanks to the prompt work of the site users and our team, we can release a virus signature that catches the virus within a few days.
Although Autodesk has released its own version of "antivirus", and there are also other "antivirus" scripts, we still recommend using Prune Scene for the following reasons:
- Prune Scene has more viral signatures than others.
- We are quick to respond and release security patches.
- Our code is more streamlined and faster.
- Upgrade to a new version with fresh signatures, instantly at the press of a one button. It literally takes 2 seconds!
- Virus detection is available even for older versions of 3Ds Max, starting in 2012.
- Prune Scene provides a search for viruses in files, you can even scan an entire HDD partition (C:/, D:/ ...) without interrupting your work!
- You can turn off notifications about detected viruses so as not to interrupt the rendering process on Render Farm.
Using Prune Scene, you can totally assured of your safety and the safety of your work.
To enable protection, press the red PROTECTION DISABLED button. If the button is green, then protection is enabled!
When protection is enabled, a virus check will occur every time when something is added to the scene, the scripts in the Startup folder will be protected from malicious code injection. Protection will work even after restarting 3Ds Max.
You can check the current scene without protection enabled by clicking the Instant Scan Current Scene button.
Note!
Protection is best activated before downloading a model from stocks or opening someone else's scene.
But we recommend that you do not disable protection for your own work safety.
Change the type of notifications about detected threats. In the Details section, select the option that suits you:
PopUp's + Log - Show the modal window and write to the log.
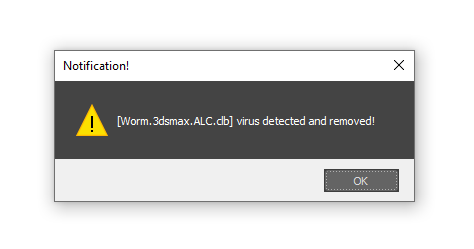
PopUp's - Show only the modal window.
Log - Log only. "Quiet mode ", modals will be automatically applied. This method is convenient if you are using Prune Scene on Render Farm.
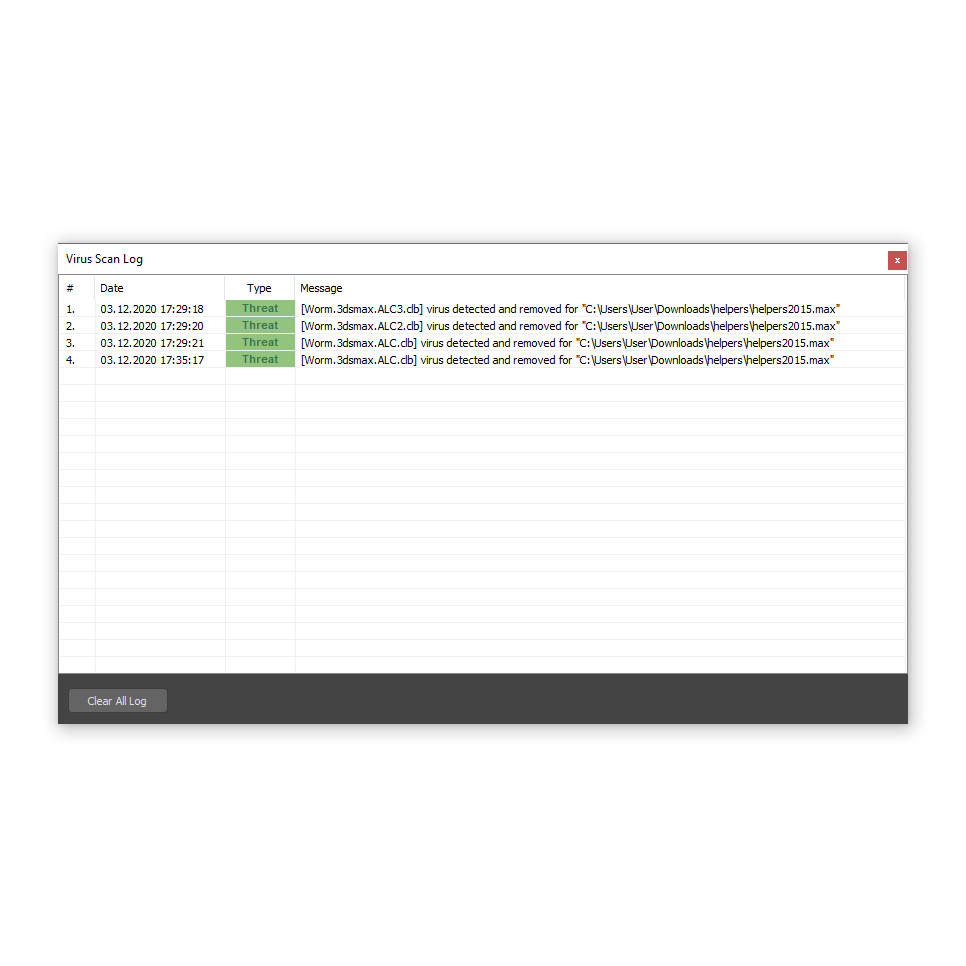
To display the active protection log, click the Show Log button.
Selective Scan

Watch this video tutorial on how to use Selective Scan:
Video instruction how to use selective scanSelective scan - helps to find viruses on your HDD without opening * .max files themselves.
Scanning is rather fast, thanks to the built-in * .bat capabilities in Windows.
Thus, you can select not only individual folders, but also whole partition C:/, D:/. And at the same time, you can continue your work! This does not put any strain on the 3Ds Max, you can even close the Prune Scene.
Important!
Scanning an entire partition can take about 5 to 30 minutes.
To start scanning, press the Select button and select the desired folder or partition. Then click >>Run Scan.
Wait until the scan is finished. You can continue your work while scanning!
Important!
Scanning occurs only for files that have not been applied 3Ds Max system setting - Compress On Save!
This means that the search does not occur in binary files, but only for files, which have not been compressed by the 3Ds Max.
For this reason it is not recommended to disable Active Protection! With Active Protection enabled, viruses are always scanned and removed (regardless of the enabled compression option)!
When the scan is finished, you will see a summary of the statistics in the Details.

To open a log of found threats, click the Detected Threats.

To remove viruses from a file, select it from the list and click Disinfect.
Click Ignore to remove the file from the list.
To batch process all files, click Batch Disinfect Files.
Important!
It should be understood that by clicking the Disinfect or Batch Disinfect Files button, you will open the file(s) and save them in the current version of 3Ds Max!
Batch processing of files may:
- Freeze 3Ds Max
- Occur unexpected errors and interrupt processing
- Some objects in scenes can be deleted
- Some files may not be able to be opened and processed due to newest version of 3Ds Max file
Disclaimer!
By using the disinfect or batch disinfect option, you agree that you have made a preliminary backup of your files and agree to disclaim responsibility for data loss or other consequences of this operation!
Batch Prune

Important!
This section appears only for users who have purchased a license!
Bulk garbage cleanup is a batch processing of files/scenes (*.max) that opens each file, cleans out any garbage, and then saves the file.
For example, you can scan your project folder or Downloads folder and clear all files of their contents garbage. This section is great for optimizing the work of preparing models for 3D libraries.
Warning!
It is important to understand that not all options are suitable for bulk clearing!
For example, the Missing Bitmaps removal option may delete all texture paths and it cannot be returned!
You must Choose your cleaning options wisely and responsibly.
When clearing debris, only those options that were selected in the Main section are used.
It is not recommended to process a large number of files or heavy scenes, as this may cause 3Ds Max to freeze.
To perform mass cleaning, follow these steps:
- Go to the Main section, disable all cleaning options;
- Then enable only those options that you think are necessary (it is not recommended to use the Missing Bitmaps option!);
- In the Batch section Prune specify a folder to search for files (it is not recommended to use entire partitions C:/, D:/, etc.);
- If you see a large number of files, clean only if you are sure that the files are small size and you have enough time to wait for the cleaning process;
- Click Run Batch Cleanup, after a while the files will be processed.
Important!
It is worth understanding that using this section, you will open the file/files and save them in the current version of 3Ds Max!
When batch processing files, you may:
- 3Ds Max freezes
- Unexpected errors occur and interrupt the processing process
- Some objects disappear in scenes
- Some files cannot be opened and processed due to an older version of the 3Ds Max file
Disclaimer!
By using the wipe or batch wipe option, you agree that you have made a preliminary backup of your files and agree to the disclaimer of liability for data loss or other consequences of this operation!
Use External Scripts
An innovation that allows you to run third-party scripts during a bulk cleanup. The scripts will be executed at the moment after the Prune Scene is cleared and before the scene itself is saved.
For example, if you need to further remove cameras and lights from the scene, or set GBuffer to default for all objects, or delete all layers and much more. When processing models from an asset library, the needs are different, so it is most convenient to use third-party scripts or ones you wrote for features that are not provided by Prune Scene.
Do you want to write a script yourself, but don’t know how? Take the Maxscript Basic course!
MaxScrpt BasicRun scripts - enables/disables the ability to run scripts from the list.
List (0) - opens a window with a list of scripts in which you can add/remove the *.ms script or set execution priority.

In the External Scripts (*.ms) list you can add your own *.ms scripts that perform an action immediately when they are launched. Or you can use specialized scripts from 3DGROUND.
You can find ready-made and free External Scripts in our repository. How to download and detailed instructions at the link below. The repository will be filled over time, read the description of each script carefully, you should not use them all at the same time.
Batch Prune Free External ScriptsWhen you add a Add to list script, it will be added to the end. To change the priority, use the context menu and the Up and Down options. Remove a script from the list - Remove from list.
When you select a script from the list, the information will be displayed in the right panel if you are using original 3DGROUND scripts (PSES).
Recovery Tools
Important!
This section appears only for users who have purchased a license!

Restore Default Project Paths
Restores default paths in Confiigure → Configure Project Paths to default values. Also removes nonexistent paths in the External Files and XRef tabs.
Video demo of Revert PathsThese paths can be confusing for several reasons:
- Virus infection
- Initialization failed
- Opening a project with a *.mxp file
- Directly opening a *.mxp file
- Changing a project via interface

Paths from Configure Project Paths can affect:
- Saving files to unwanted folders: autoback, export, images, etc.
- Slowdown of work and scene loading due to the search for Missing textures in folders from the list
- XRef disappeared models in the scene
Update System
The automatic update system allows you to download and install a new version of the script in quiet mode.
Important!
The update is available only for those who have purchased a license key!
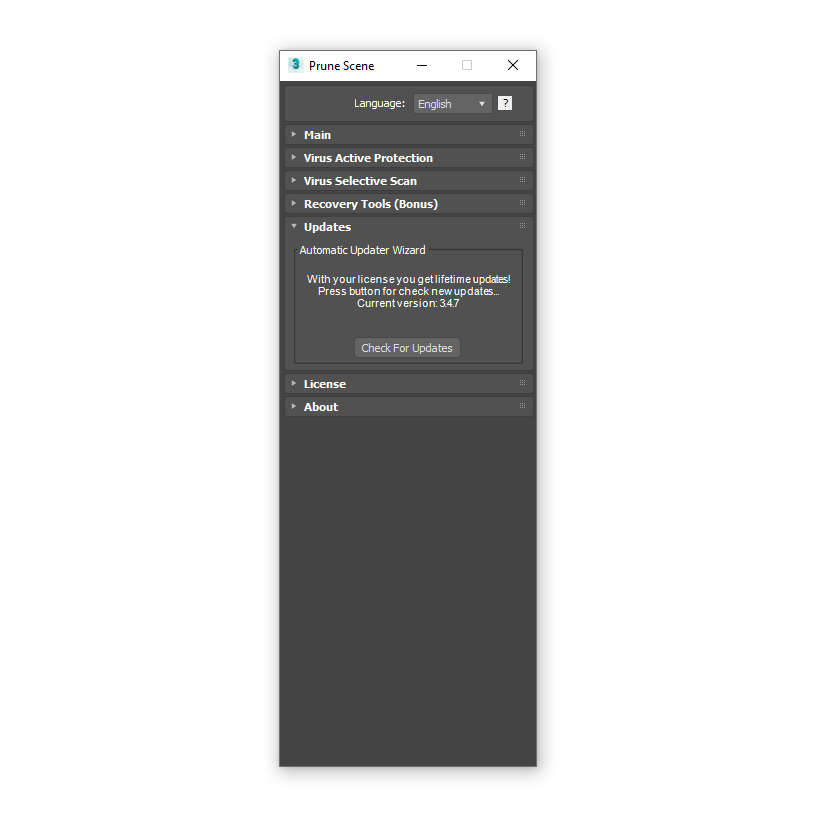
Click the Check For Updates button.
If new updates are available, you will see a green indicator with the new version.
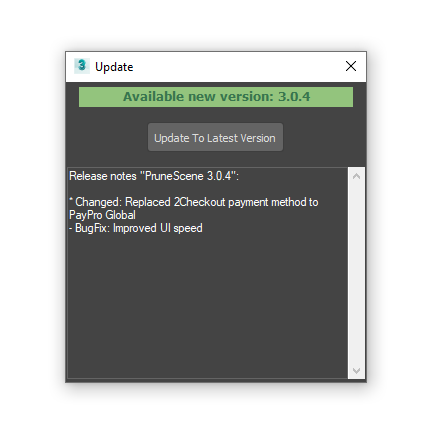
Click Update To Latest Version and wait a few seconds. After a successful update, you will see a message:
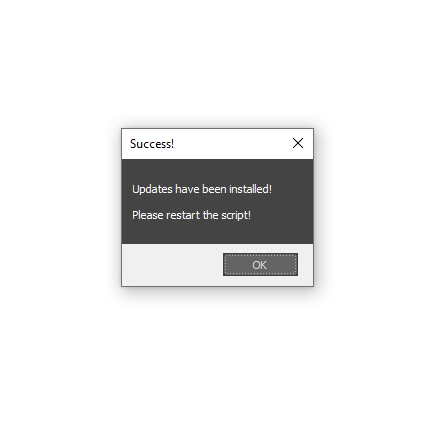
Restart Prune Scene and enjoy the new version 😉
License
This script is distributed under a shareware license. This means that you can use Prune Scene absolutely free!
All basic functions will be available for free, except for the automatic update function by click of a button Check for Updates or other items specified in the "Obtain license" section. below.
Unfortunately, the development and various kinds of improvement of this software is impossible without your support, both tangible and intangible.
In addition to the basic functions, the script added: quick updates, multilanguage interface, convenient installer, well-described manual in several languages - all thanks to your support!
We really appreciate your contribution to development, be it purchasing a license, reposting or liking on social networks, recommending to a colleague, reviewing on a video hosting or forum, suggestion for improvement, your feedback, and more. And we are grateful to you for your indifference to this product!
At the same time, we are well aware that not everyone can make a tangible contribution - without such an opportunity, for example, being a student or not receiving income from your work in 3Ds Max, and we do not require this from you. Therefore, we made the product free to use for absolutely everyone! We perfectly understand the inconvenience of subscriptions or the dependence of the license on the version, or other ways to stimulate sales and repeat purchases - so we abandoned this in favor of convenience and made lifetime licenses.
We hope for your understanding and desire to really help the development of our resource. The complexity of development increases with each new release, and lifetime low-cost license keys do not bring super-profits. If you want the project to develop and improve - purchase a license key.
By purchasing a license, you are not only contributing to the future of this software, but also encouraging other useful products.
After all, we are trying for you 😊!
For a more detailed description of what features the license provides, read below ...
Purchase LicenseObtain License
- You will disable the modal window when you run the script, where you need to press 1, 2 or 3 to close it
- You will have lifetime updates
- You will have the option to update by one click Check For Updates
- You can use the script on Render Farm
- Every major release will be notified by email
- You will support the author and continue developing this script
- You will receive full support
- You will be able to participate in the development of the script
License Agreement
- This software is free for everyone to use
- You can use almost all the functions of this software for free
- You can use 1 (one) license key for a maximum of 2 (two) computers (Home and Work)
- The author does not bear any responsibility for the possible loss of data on your computer or other damages associated with this software
- You may not transfer to third parties persons or sub-lease the license key
- You are not entitled to profit from the use or provision of the license key, either for direct commercial, monetary or other benefit
License Message
Every time when you launch Prune Scene, you will see a message asking you to buy a license.

To close this window, press 1, 2 or 3.
Look at the message "For close this window press button # ... ".
By closing this window, you can continue to use all functions for free (except for those indicated above in the "Obtain license" section).
Purchase and using a license key
To purchase a license key, go to the product page:
Prune Scene PageAnd click Buy.

Or click on the link >> Press here for buy License Key <<, in the script license window.
You will be redirected to the payment page.
Choose a convenient payment method. Please fill in your Name, Surname and your email correctly.
Important!
Please provide correct information when making a purchase! A message with a license key will be sent to your email address!
Watch a short video tutorial on how to purchase and use a license key:
How to purchase licenseYou can use the license key on a maximum of 2 computers (Home & Work) .
Your license will work permanently and you will receive lifetime updates!
After payment, find your license key on the email you specified. Find it and copy it to clipboard.

Paste the key you copied into the license notification window.

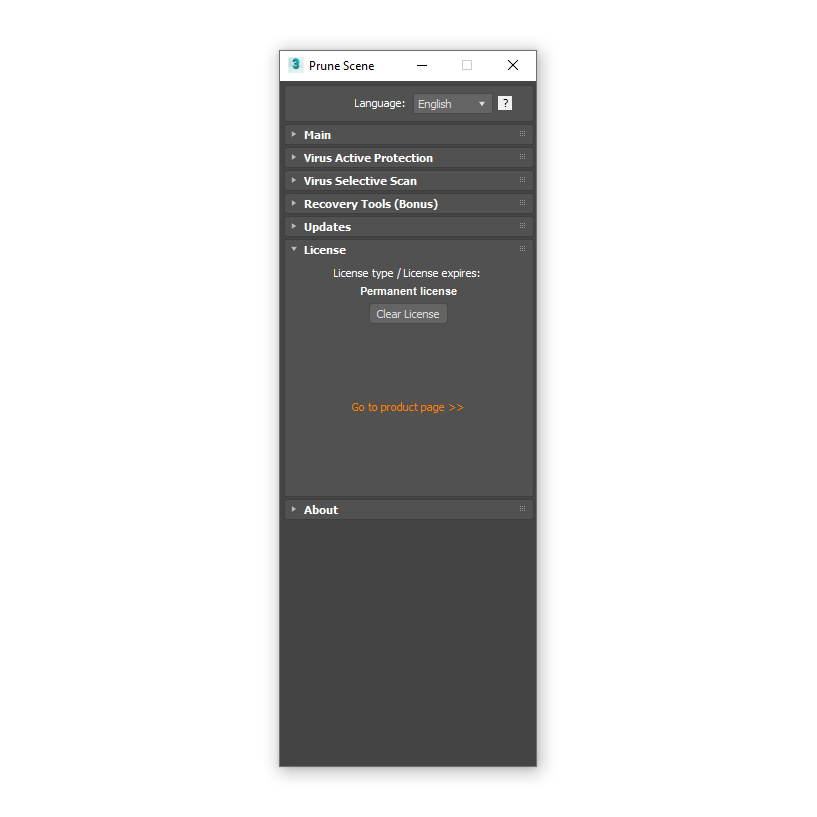
If you did everything correctly, when you start the script, you will no longer see the license message.
And, in the License rollout, there will be a message about the lifetime license.


{{comment.text}}