 English
 Intro Part 2
This is Part 2 of a series of tutorials on creating an interactive SVOYA interior with WebGL/PlayCanvas.
For those who haven't read the previous parts, here's a demo video.
In this series of tutorials, we will make an interactive interior presentation that can be viewed in real time through a web browser.
Access to materials such as: models in "FBX" format, baked textures and more, you can get by subscribing to Patreon.
Patreon - 3DGROUNDInstruments
Before diving into the workflow, let's talk about the tools we'll be working with.
Playcanvas
You will need to register on the Playcanvas website if you haven't already. Instructions can be found here:
PlaycanvasPhotopea
I have not used Photoshop for a long time, instead I found a convenient analogue of Photopea - it is an online editor that works without installation in a web browser. You can use it for free.
3Ds Max
I use 3Ds Max 2022 for work and this is very important, because in this version the texture baking section has been finalized to the mind. Of course, you can repeat everything on older versions if you wish, this is just my recommendation.
Render
As a renderer I used Corona Renderer 7.
Scripts
Scripts for 3Ds Max: Prune Scene and Stock Model Fixer.
To remove excess debris and correct problematic geometry.
Prune SceneStock Model Fixer
I also used my own export script for work, it will be attached in one of the parts of the lesson.
Stage preparation
The process of creating architecture, selecting 3D models and lighting, I will not describe in detail. My assistant Yana Melnichenko helped me with this, for which I am very grateful to her. I don't think that it will be difficult for you to assemble such a scene, especially since there are many good tutorials on the Internet.
I will attach a link to Behance - Yana Melnichenko.
Behance - Yana MelnichenkoArchitecture
On the svoya-studio.com website you can find an interior plan.
https://svoya-studio.com/portfolio/interiors/see-the-sea
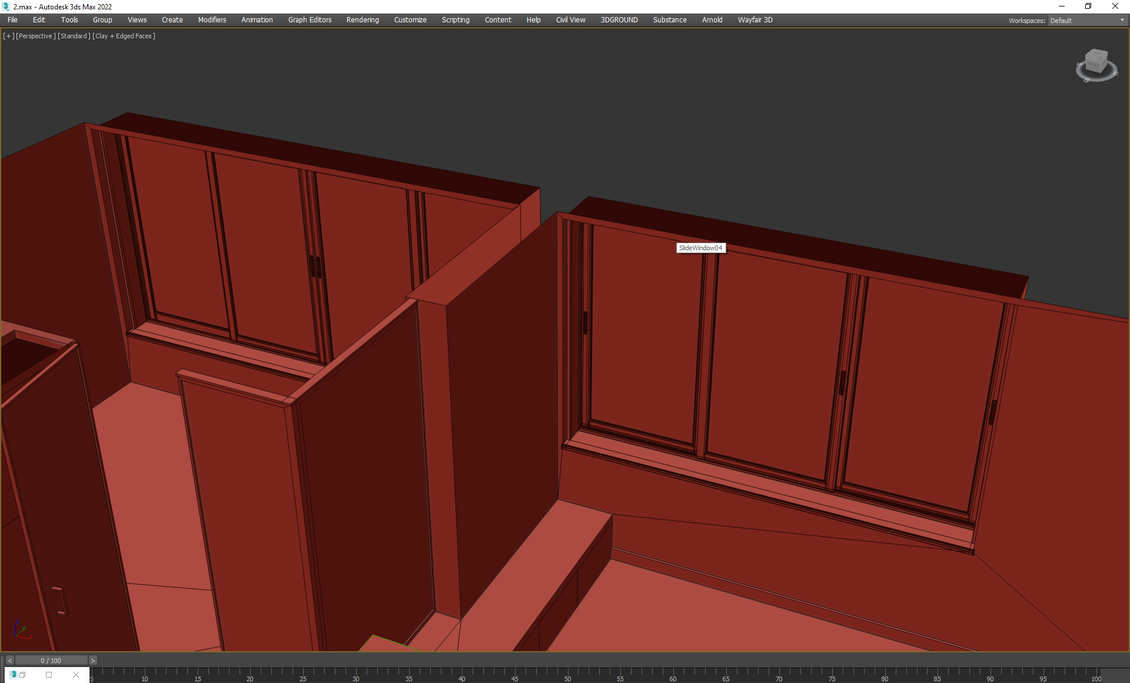
We add the plan into 3Ds Max, create the architecture. She's pretty simple here. In the example below, you can see that the bend was not even created to save polygons.

The walls are made 1 polygon thick. Windows are a small "Extrude". The floor and ceiling are also 1 polygon thick and made by separate objects.
Lockers are the usual "Plane", with segments and small "Extrude" faces to imitate doors.
Adding models
Windows were then added and ceiling lights modeled.

Gradually, other items were added to the interior: a parquet board, a sofa, a mixer, a sink, a picture.

Some models were used from ready-made ones, some were created from scratch.

For example, the TV was made from scratch and has only 18 polygons.

When adding third-party models to the scene, do not forget to open them in another 3Ds Max window, then clean them up using the Prune Scene and Stock Model Fixer scripts.
Render
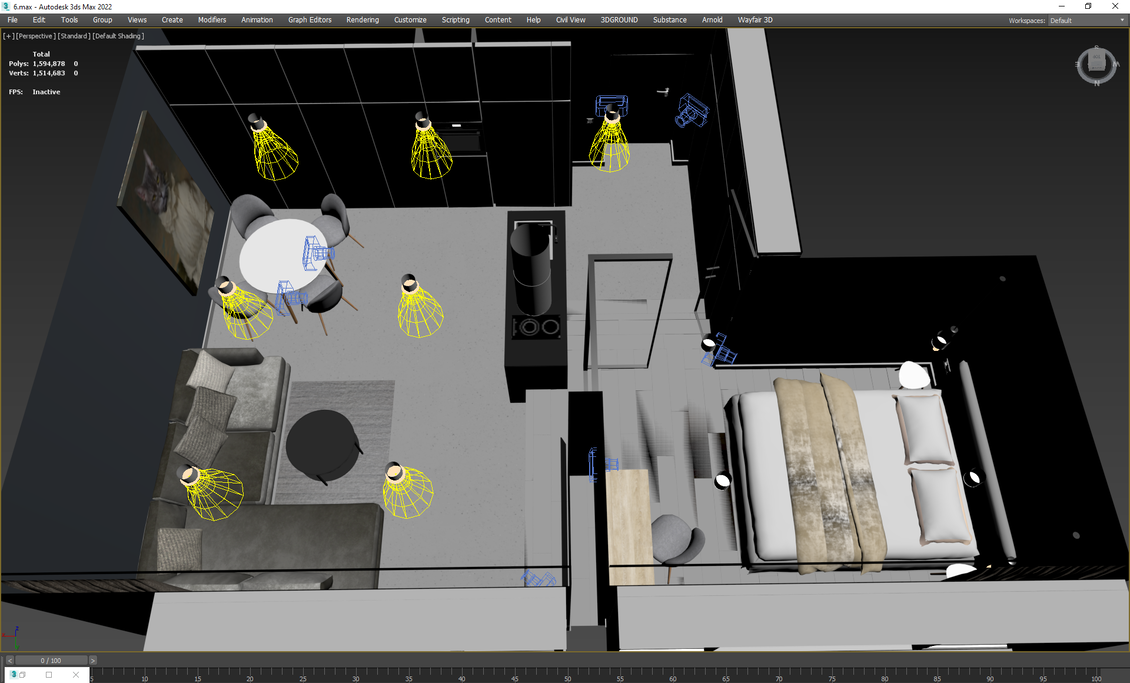
After the stage is filled, you can set the lights and work with the materials. I must admit, at first I wanted to make the scene under V-Ray, but unfortunately I spent a lot of time setting up the lighting and did not achieve the desired result. In Corona Renderer, the desired result was obtained almost immediately.
I had an idea to bake the textures through the "Projection" modifier. Those. from "hi-poly" to "low-poly" the model would transfer all the detail. But, unfortunately, Corona Renderer has not yet learned how to work with it.
In the end, the rejection of the "Projection" modifier saved a lot of time for preparation and setup, and the result of regular texture baking was not much worse.
After doing a few test renders, I got the same result.
Pay attention!
For all materials, reflections are decreased as much as possible or blurry reflections are made. In the future, we will add the necessary reflections in the Playcanvas!

The quality of lighting and materials completely suited me and I moved on to the next stage of optimizing the models.
But we will talk about this in the next part of the lesson.
Conclusion
Setting up the scene, lighting and materials is finished. It's been a nice milestone as we're looking forward to model optimization and Unwrap.
Don't miss the next lesson, there's more to come...


{{comment.text}}